Showing posts with label laces. Show all posts

Thursday, June 25, 2015

"Oh So Lovely" Altered Photo Display Tray

Welcome back crafty friends. It's been a few weeks since I posted anything on my blog, but I got a good reason, I promise. You see, I uh...lost my mojo. I know, I know, that's crazy right? I tried and tried to sit down and create something pretty, but my mind was just  blank. Nothing was coming to me and I was just dying to create!After several days of ,well, nothing, I decided to take a break and just ride this one out. I've been stressing out a lot lately and I think that had a lot to do with me not being able to create. I knew my mojo wasn't gone forever ( or so I hoped). I think I just needed a little  "me" time with no DT projects and commitments. Sure enough, a few days ago, I was finally able to sit down and like magic, all my creative juices started flowing again! Yippee, my mojo was back! I've never been happier to get my hands all inky and create a mess in my craft space,lol. Today I'm sharing the fruits of my labor, a true labor of love.


You have no idea how happy it made me to finally craft! I had recently purchased Kaisercraft's "Oh so Lovely" paper pack and I was inspired by the beautiful mother/daughter sentiments throughout the collection. So, I decided to alter a photo tray, I had picked up at my local  craft store, and create a tribute to the special bond I have with my girls.


I wanted the tray to be bright, fun and feminine. The girls and I took silly selfies that I changed to black and white to coordinate better with the paper collection. I added bits of lace and sweet feminine touches throughout the tray.


I love the look of bare wood embellishments,that's why I left the word "Smile" as it was. The frame was die cut from chipboard and pattern paper and then I cut it in half.The sentiment in the center is from the coordinating Collectables pack by Kaisercraft.


 This is the sentiment that inspired the entire tray. I popped it onto another die cut piece and layered it over a paper doily. The birdcage was fussy cut from the collection and I also added two glass vials on the lower right hand corner. The vials are filled with tiny beads from my stash.


 Here's a silly picture of my oldest daughter and I . She has a habit of taking pictures with half her face gone,lol. I added a cute resin bicycle and lots of handmade flowers. The words are stickers that I cut up and popped up with foam tape.


I created a cute little banner to spell out "Love" and adhered it to the top of the compartment. Here's another silly picture of my little girl and I.A bit of lace and pearls round out this compartment.


For this compartment, I created a little "art journal" using Spellbinders Labels 7 dies. I created a little book and used a script stamp to stamp on the pages. I cut out the individual words from a sticker phrase.


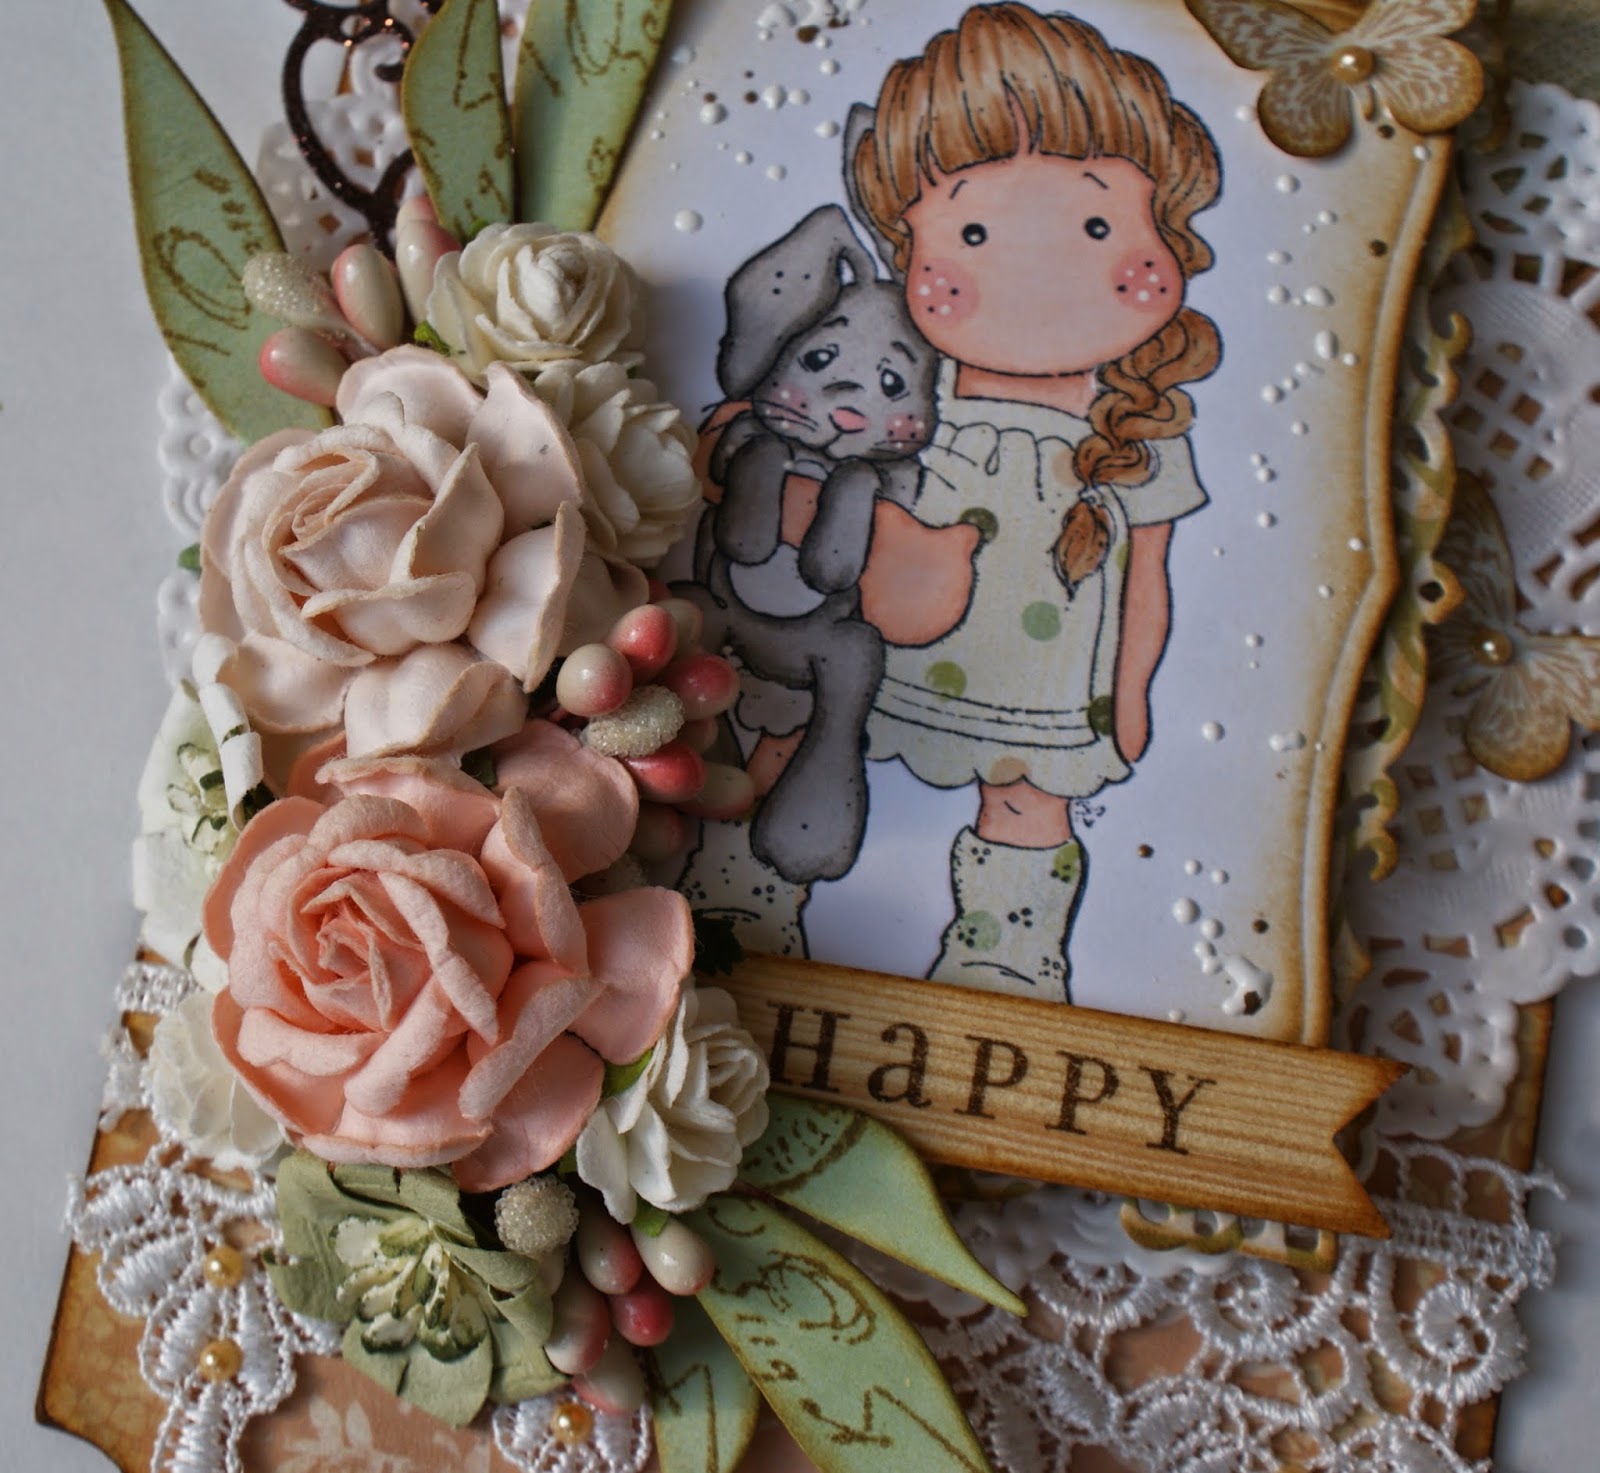
All of the gorgeous flowers were handmade out of coffee filters. You can check out my coffee filter flower tutorial here.

Thank you so much for stopping by today! Hope to see you all real soon.

Friday, May 8, 2015

Mother's Day Coupon File Folder Folio

Good morning crafty friends. With Mother's Day only  a few days away, I thought I'd share with you a sweet gift idea for the special woman in your life. I was inspired by a grocery store run and a childhood memory. Weird, I know.When I was about 9 years old, I remember making a coupon book for my mom, for Mother's Day. Do you guys remember those? Each coupon was good for a small chore or kind gesture for your mom, to show your appreciation.Well, I was remembering all this while pulling out my coupon folio at the grocery store.You know, the kind that has pockets inside to sort your coupons? I combined the two ideas together and created my grown up version of that childhood coupon book to gift my mom this Mother's Day.


Here it is! Isn't it pretty? I thought Graphic 45's Precious Memories collection would be perfect for my project. I love the sweet mother and baby images and it has lots of blues, which is my mom's favorite color. The folio is constructed of card stock and I found the tutorial here. It measures 7x9 inches and has 6 pockets inside.


Here's a view of the cover. I did a lot of fussy cutting to create a collage, if you will. You can see bits of lace peeking out in the back and I used one of the post cards from the ephemera pack.I also used one of the chipboard pieces from the collection and accented it with tiny pearls and a sweet little bow.


I created 5 large, tag shaped coupons.Each has a sweet sentiment stamped onto one of the smaller journaling cards. Then I added fussy cut flowers and used the sticker sheet to spell out "coupon" at the bottom of each tag.


I printed out the coupons ,cut them out and adhered them to the back of each tag. So all my mom has to do is select a coupon and hand it over to redeem it. Easy, and this guarantees me some quality time with mom! We can take pictures during our times together and she can keep these pictures inside her folio. Precious memories! 

I do hope you like my Mother's Day gift idea and to all the mothers out there, I wish you a wonderful Mothers' Day!!!

Thanks for stopping by today. I'll be seeing you all real soon!

Friday, March 20, 2015

Pretty Magnolia Tag made out of Packaging Material

Hi guys and welcome back to my blog! Today I want to share with you a great idea on how to turn you embellishment packaging into pretty tags. Whenever I open a new package, I'm always looking for ways to re-purpose the packaging. Whether it be cardboard, plastic, netting, etc. The backing material on some of the embellishments, come in great shapes and can make for awesome tags. I've created a beautiful Magnolia tag out of Prima packaging as my design team project for Not2Shabby.


Turning your packaging into a pretty tag is quite easy. I always look for packaging that has a neat design or details, such as eyelets, as my base. Then you simply trace the packaging onto designer paper of your choice. Cut it out and adhere to both sides of your packaging material with your favorite adhesive.


So here's the pretty tag I created using the sweet Magnolia image. It's called Tilda with Hanging Rabbit and you can purchase it here. I've used Colorbok's Victorian Parlour collection to cover the tag and inked all the edges with Brushed Corduroy Distress Ink. I also busted out my Doohickey dies and some pretty laces I had in my stash.


I colored the image with my Copic markers and I paper pieced her dress and boots. I also added Frantage in Shabby White around the image for more detail. It's my first time using it and I love the way it looks!


The flower cluster turned out so pretty. I just used flowers from my stash and these cute little pips I picked up at my local craft store. The leaves are from the Doohickey Club Dies Volume 4 and I stamped on them and inked them with Brushed Corduroy. The wood banner has been in my stash for ages and I thought it would make for a perfect sentiment on my tag.

I hope I've inspired you to look at your "trash" in a whole new way. I think I'll be making a few more of these tags!
Head on over to Not2Shabby and take advantage of Jamie's flash sale going on now until Sunday March 22. Almost everything in the store is 10% off and if you use Discount Code "LIZRUSSELL" you will get an additional 10% off your purchase. What a great deal!

Thanks for stopping by and I'll see you all real soon!