Showing posts with label Lindy's Stamp gang. Show all posts

Tuesday, April 28, 2015

Springtime in Paris Mixed Media Canvas

Welcome back to my blog! Today I want to share a very special project I created, recently, for Craft Source. Craft Source is a new, members only website, where for a $35 membership fee you can join and take advantage of deeply discounted craft products, bundled buys, exclusive tutorials and product review videos, monthly challenges and much more.They offer tons of bundled products and bulk buys. So the more you shop, the more you save and the products are discounted 15-35% everyday. Sometimes even more! For a limited time, the membership fee has been reduced to $25 so if you want to take advantage of this great offer you can sign up here.

Springtime in Paris

I started off with a 12x12 canvas and primed it with a light coat of gesso. Then I adhered two large pieces of music sheet to the top right and bottom left corners. I spread my homemade texture paste all over the canvas, heavy in some areas and lighter in others.Love this stuff because it creates such great texture and small cracks
.

I used a damask stencil and Faber Castell Whipped Spackle to create even more texture. Then I used  Lindy's Stamp Gang Flat Fabio sprays in T- Bird Turquoise and Ocean Breeze Blue and sprayed it all over the canvas. Because the Flat Fabios don't have any shimmer, I mixed up some Finnabair Mica Powder in Teal with a bit of water inside a spray bottle. I sprayed this mixture onto the canvas and even created drips along the flower clusters for a shadow effect.  Next, I went over the top of the damask texture with Faber Castell's Texture Gems in gold. I just dabbed it over the tops with my finger to add a gold shimmer. You can also see  some of the stamping I did with Fiannabair's Messy script stamp and the spattering of paint I created.


The theme of the canvas is Springtime in Paris, so I made sure to include tons of flowers on my project. The tree branches are cut from chipboard using Tim Holtz's Bird Branch die. I cut off the bird and glued 3 pieces together. Then I painted them a dark brown color and painted a coat of white acrylic paint on top of that. I distressed the branches with a sanding block to reveal some of the brown underneath. The tiny leaves are from an old punch and the small pink flowers are by Prima. I love the way the flower clusters turned out. You can see bits of cheesecloth and lace peeking out and the gold berries really pop!


The Eiffel Tower image is from the internet. I printed it out and framed it with a small frame from my local craft store. I dabbed the once green frame, with white acrylic paint and more of the gold Texture Gems using my fingers. The little resin birds are Prima Shabby Chic treasures also dabbed with Texture Gems, this time in platinum. I love the sheen, the Texture Gems create.


Where there are flowers, there are butterflies. I stamped some butterflies on vellum and heat embossed them with gold embossing powder. Then I just cut them out and placed them throughout my canvas.


I spelled out "Paris" with some alpha stickers dabbed with acrylic paint. Then I added Finnabair's Art Ingredients Glass Bleads in Crystal to the bottom left corner. There is some on the top corner too, but it gets covered by the flowers.

Almost everything I used to create my canvas can be found at Craft Source. They are your go to shop for just about all your crafting needs. Take advantage of the limited time membership offer of $25 and sign up today! 

Thanks for stopping by today, and I'll see you all real soon!


Sunday, April 27, 2014

Kaisercraft Altered Dressform & Shabby Chic Card

Hello there friends! I'm back to share some new projects I created for a dear friend. She recently celebrated her birthday and is also in the process of redecorating her craft space. So I thought it would be perfect to create a décor piece that will fit right in with her new décor.


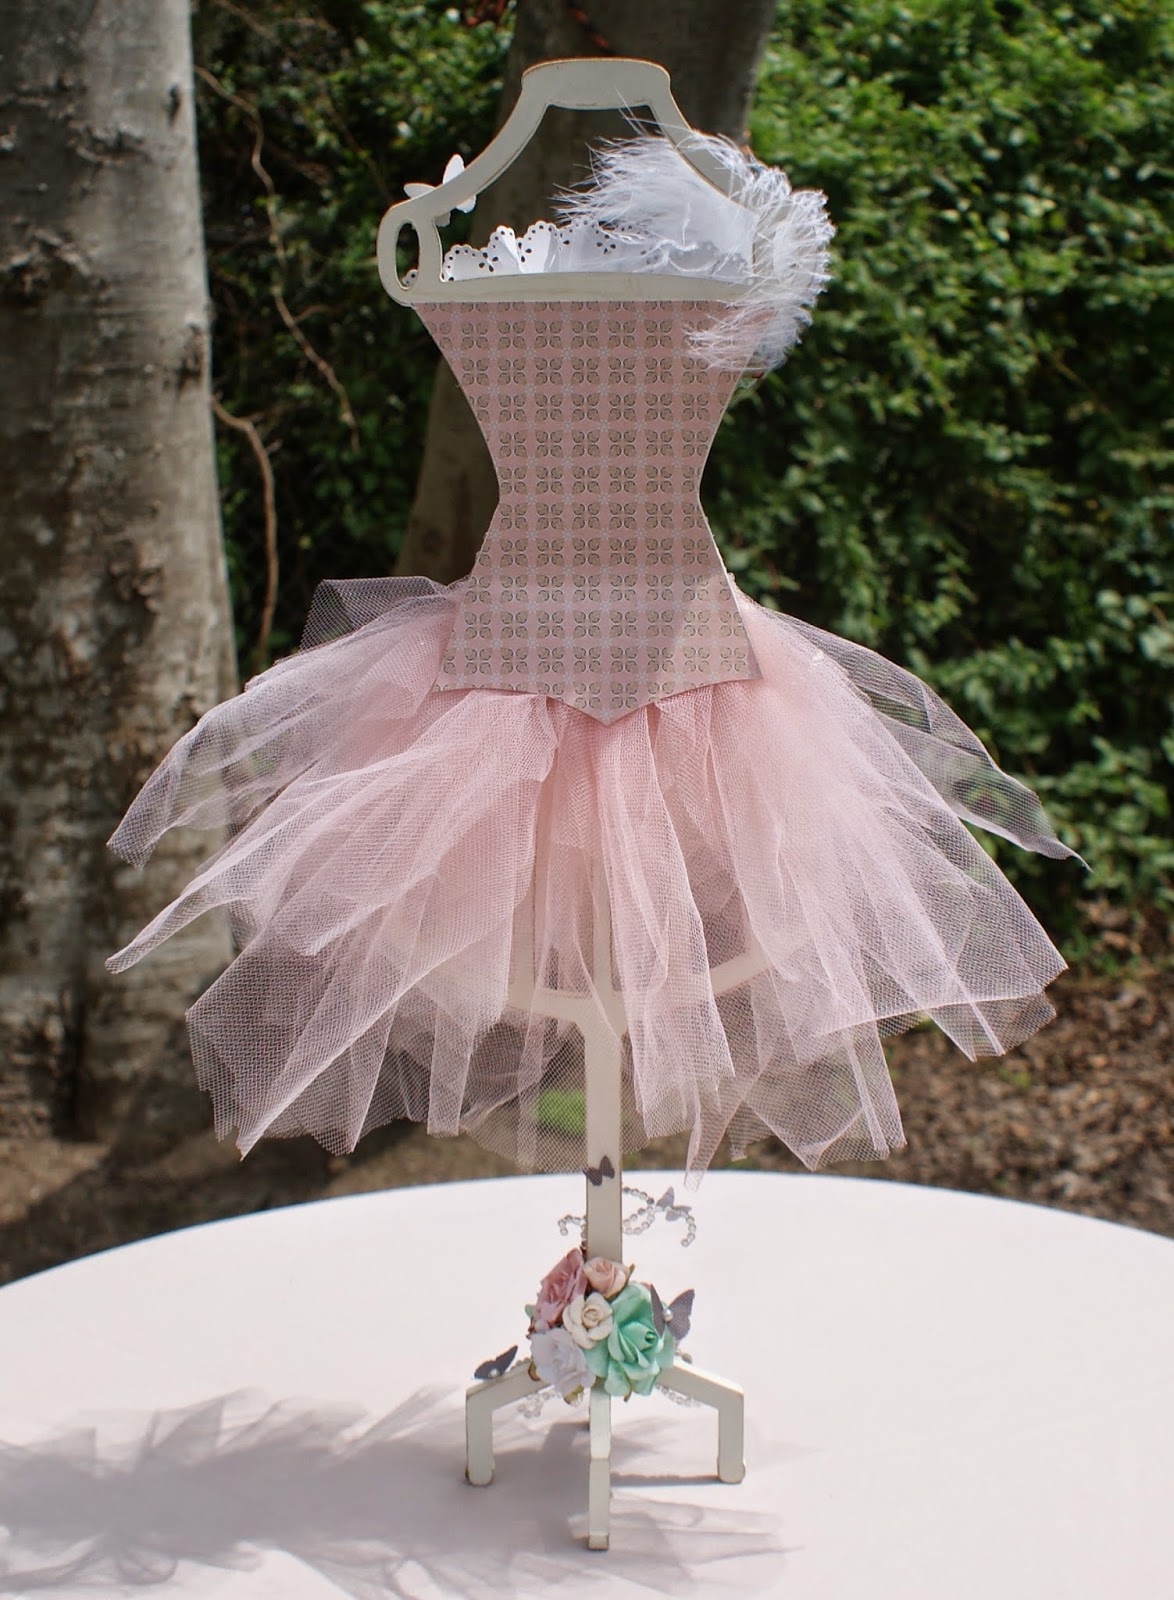
Ta-da! My Shabby Chic dressform!
 
I've had the Kaisercraft dressform for a while now and it was just begging to be altered. I gave it two coats of warm white paint and I sanded all the edges to give it a worn look. I used the "On this Day" paper collection, also by Kaisercraft, to create the pretty little corset.
 
 
I created the skirt out of pieces of gathered tulle. I only had white tulle so I colored it using Heidi Swapp's Color Shine spray in Blush. It is the perfect shade of pink and complimented the papers so well.
 
 
Here's a close up of the corset. Omg, those eyelets were a pain in the butt to set but I'm so glad I took the time to do it. They're the perfect touch!  I had to color that ribbon as well since I didn't have it in the right color. I just used a combination of Lindy's Stam Gang Sprays to get the right color. And just look at all those little rhinestones! Now that took some patience,lol. They are so tiny and I had to use a dab of glossy accents to adhere them on. It's all in the details!
 
 
I even finished the back.
 
 
 I kept the base pretty simple. Just added some dyed flowers, some pieces of bling flourish and cute little punched out butterflies. Pretty cute huh?
 
 
Now, you can't give a gift without a pretty card right? And as always, I like to coordinate my card to the project I've created. The card measure 5 1/2 x 51/2 and has several layers. The wooden piece in the center is from Michael's and I left it bare, since I really like the look of the wood. The colored flowers were dyed using color sprays I had on hand.
 
 
 Here's just another look at the card. You can see I finished the inside as well.
 
 
Here are the two projects together. I just love how they coordinate.
 
Well, that's all for today. I really hope you liked my projects. I had so much fun creating these for my friend. She smiled so big when she opened her package and that in itself is the greatest gift. Hope you all have a wonderful week and I'll see you all real soon!