Showing posts with label shabby chic. Show all posts

Wednesday, August 19, 2015

Cupcake Themed Projects for Sweet Thang Swap

Good morning crafty friends! Today, I want to share a few projects I created for a recent swap I participated in. The swap was hosted by Traci, the owner of Art Attack Supplies over on Facebook and it was a sweets themed swap. I chose cupcakes as my theme and we were to create a bottle cap charm, a card, an altered journal and an additional handmade goody of our choice.We also had to make sure our projects were all packaged up in a pretty fashion.


Here's the bottle cap charm that I created. I purchased the cupcake images on etsy, punched one out and covered it with an epoxy sticker. I added glass beads and cute metal charms to dangle from the chain. For the packaging, I used my Spellbinders Curvy Rectangles die and cut out a thin piece of chipboard and covered it with a piece of pretty pattern paper.I used thin wire to keep my bottle cap charm in place.


I embossed a small glassine bag, and placed the bottle cap charm inside. Then I added a paper doily and a cute tag I created using Spellbinders dies, Avery Elle's cupcake stamp set and coordinating die, and a wood clothespin.


Next up is the Cupcake card! I used some pretty pattern papers from my stash, tulle and a pretty doily to create layers for my card. The large cupcake was die cut from an older Sizzix die called Cupcake and Cherry. I did some stitching on the cupcake liner, created a seam binding bow and a little tag stamped hello. I think it turned out so cute! 


I created a coordinating card box to package the card. The box is made out of white card stock and then covered with pattern paper. I made a cute paper rosette and topped it off with a bottle cap and sweet cupcake image. The rosette is adhered to a white satin ribbon belly band.


And here's the altered journal. I found the journal at my local craft store, covered it with layers of card stock and pattern papers. Then I added a bit of lace and another paper doily. I found the vintage cupcake image online and thought it went perfectly with the papers.


The pretty roses are from my stash and are covered with Diamond Dust for that "sugared" look. Then I added the Spellbinders die cut leaves to my flower clusters for a fuller look. I added a laser cut word at the bottom to complete the sweets theme.


I kept the packaging simple by wrapping the journal in tissue paper and ribbon. Then I topped it off with a burlap rose and vintage tag.


For my homemade goody of choice, I chose to make a cupcake shaped soap. It was my first time making soap and it was actually a lot of fun! I forgot to take pictures of the cupcake soap but you can see a little bit of it here, inside the oven box I packaged it in.


I found the oven box template here.(Thank you so much Marzi for the tutorial and template). I covered the box panels with paper as I was putting it together. Then I inked all my edges lightly with Vintage Photo Distress ink. I used metal brads for the "knobs", printed a tiny clock face and adhered it to the top. The burners are small circular paper clips I picked up at my local craft store.I also made a little oven mitt and hung it from a hook on the side of the oven box.


I added a strip of decorative card stock and braided trim on the sides of the oven box to pretty it up some more.Then I created a seam binding bow and topped it off with a tiny cupcake cut out.

I had a lot of fun creating all these projects and I sure hope my swap partner likes them!

Thanks so much for stopping by today!
I'll be seeing you real soon.

Sunday, July 12, 2015

Tilda Altered Tray Embellishment Center w/ 3D Tea Cups

Happy Sunday everyone! Today, I'm coming at you with my first GDT project for Sacrafters shop, for the month of July.  Sa sent me so many awesome goodies to alter and I always get so excited when I'm asked to guest design for her shop.One of the first things I noticed, in my DT package, was a cute little serving tray. Having recently picked up Tim Holtz Tea Time die, I thought of a great way to incorporate the two into a cute embellishment center. Check it out!


This is the largest of the serving trays available in Sa's shop and was so easy to put together. I painted all the exposed parts with Bleached Sand acrylic paint by Americana and then I covered it with papers from Tilda's Tiny Treasures paper pad. I just adore this paper pad for all it's sweet images and gorgeous papers! 


All the edges were distressed with a sanding block to give it an aged look. Then I adhered a pretty floral trim all around the tray and flat back pearl trim on top of that.


I created small flower clusters on each handle side with die cuts from the paper pad and flowers from my stash.


I'm so in love with the gorgeous prints of this paper collection.
So shabby chic!


The sweet tea cups were created with Tim Holtz Tea Time die. I die cut the tea cups and saucers from the paper collection and made them 3D. If you're interested to see how I did that, go check out my mini tutorial, here.


I added a flower die cut piece to the front of each tea cup. Then I made the cute little tags and glued them to the inside of the tea cup. I filled each tea cup with shredded tissue and tiny fabric flowers. And now I have a really cute embellishment center for my craft table! I can switch out the embellishments to suit the project I'm working on and the tray serves as a pretty decor piece.

I hope you like my project and I encourage you all to check out Sacrafters shop. Her off the page products are so unique and so much fun to alter. You can use my discount code "LIZFANS" for 10% off your purchase of  $30 or more.

Thank you so much for stopping by today! Hope to see you all real soon!
Have a great day.

Thursday, May 21, 2015

"Little Miss" Altered Shadowbox Stand

Hello crafty friends! Welcome to another project share for Sacrafter's shop. Like I've mentioned in my previous post, I'll be guest designing for her shop for the entire month of May. If you are not familiar with Sa's store, I highly recommend you check it out, here. You will find wonderful wood pieces to alter as well as amazing,one of a kind, wood and chipboard die cuts for all your crafty projects. I also have a a special discount code you can use to save 10% off your purchase of $30 or more.Simply type "LIZFANS" in the coupon box and, instant savings!
So today's project share is an altered shadowbox I created for my oldest daughter.It's just a little reminder for her to remember to always "shine"!


This is Sacrafter's Square Shadowbox Stand. It is made out of MDF wood and is so easy to put together. I covered the wood pieces with Bo Bunny's Little Miss collection. I only had a few pieces left of this collection and I put every scrap to good use.


I adorned the shadowbox with different fussy cut elements from the paper collection. Then I draped some pearls for an elegant look. Lastly I added flowers in coordinating colors and a beautiful Magnolia Doohickey butterfly to the corner of the box.


There's a picture of my lovely daughter inside this cute, resin frame. I just look at her picture and can't believe how much she's grown! She's turning into such a beautiful young lady, inside and out.The background paper had a really great quote that I thought fit perfectly with the project. It reads "Don't be so hard on yourself, choose to shine." She's had problems with low self esteem in the past and I've always told her it's a matter of choice. It's our choice to "shine" and be happy or to choose to be down in the dumps.Embrace who you are and be the best at being you! I think she's actually listened,lol!


This is the base of the shadowbox stand. I created a little cluster of  flowers, pearls and a fussy cut birdcage at the bottom.


 Side views of Shadowbox Stand.

 Back view of Shadowbox Stand.

My daughter loved the final outcome and called it her "little shrine". I'm just happy to have put a smile on her pretty little face.

If you would like to get your hands on this shadowbox or other similar products, head on over to Sacrafter's for a huge selection of off-the-page products. Don't forget to use my discount code for even more savings.

Thank you so much for stopping by today. I hope you like my project and I'd really love to know what you think.
Have a wonderful day and I'll see you all real soon!

Tuesday, May 19, 2015

Tilda "Happiness is Homemade" Altered Dresser

Good morning crafty peeps! Today I want to share another project I created for Sacrafter's shop. I'll be guest designing for her store the entire month of May and you can use discount code "LIZFANS" to save 10% off your purchase of $30.If you are not familiar with her store, you definitely want to head on over and check it out. She carries the most amazing and unique wood pieces to alter.All her products are so easy to put together and are made of quality materials.But don't take my word for it, check it out for yourself, here.
So today's project is another storage piece for my craft space. I altered her Wood Chest Dresser to store all my needle craft embellishments.


I busted out my Tilda "Happiness is Homemade" paper pad because I thought it was perfect for the  theme I was going for.


I really love this page with the Tilda doll so I used it for the front of the drawers and just added the little knobs. All the edges are inked with Vintage Photo.


I had a hard time cutting into this paper pad because the papers are just so beautiful. That's the reason I didn't embellish the sides and  just showcased the papers.


The top of the dresser looks so cute with all the needle craft themed embellies.I love the die cuts that come in this collection; cute little button cards,thread cards, flowers etc.I added some embroidery floss and a sewing needle to one of the thread cards to give it a realistic look. The little basket was a find from the thrift store and I created the little yarn balls from some leftover yarn.I made the knitting needles out of toothpicks and adhered a pearl to one end.The wooden spools are from my local craft store and I just wound a bit of lace around them.Then I added flowers, buttons and that cute scissors charm from my stash.

I love the way the dresser turned out and the 3 drawers provide enough storage for my embellishments. Plus the piece looks so cute sitting on my cabinet!
Hope you enjoyed today's project share. Please come back and visit me soon.

Have a wonderful day!

Thursday, May 7, 2015

Shabby Chic Wood Heart Banner

Hi guys! This month I've been asked to be a guest designer for my sweet friend Sa's shop. Sacrafters carries tons of OOAK wood and chipboard products to alter, as well as embellishments and stencils.And her prices can't be beat! You can use my discount code "LIZFANS" for an additional 10% off your purchase of $30 or more and it's good for the entire month of May.
Let me share with you my first DT project for the month.


I altered her Wood Heart Mini Album and turned it into a banner for my wall. I've been stressing out a lot lately and I just wanted a little reminder to appreciate the little things in life, and not worry about things I can't control. Of course, I had to make it shabby chic to go with my decor and I think it turned out quite sweet.


You get 10  raw wood pieces, 5 solid pieces and 5 cutout pieces to lay over the base. I didn't paint mine but simply covered them with designer paper and inked the edges with Frayed Burlap Distress Ink. I printed out the words onto pattern paper and then adhered each word to the heart base, making sure I centered it with the opening of the heart shape.


The small flowers are all from my stash and I dabbed white acrylic paint to the tops. I created the music sheet flowers with my Spellbinders Bitty Blossoms Die and then sprinkled the flowers with Glamour Dust.


I really like how each piece has a different "window" shape, so I accented each opening with mini flat back pearls. The pearls add such a pretty little detail.


Lastly I threaded a piece of jute through each of the holes and tied pretty pink bows in between each wooden heart piece.

My heart banner looks so pretty on my wall and best of all it reminds me to "Live, Love, Laugh every day". And at the end of the day that is all that really matters!

I hope you like my project. Head on over to Sacrafters shop and check out all her alterable products and don't forget to use my discount code "LIZFANS" to save even more.

Thank you so much for stopping by today! I'll see you all real soon.

Tuesday, April 28, 2015

Springtime in Paris Mixed Media Canvas

Welcome back to my blog! Today I want to share a very special project I created, recently, for Craft Source. Craft Source is a new, members only website, where for a $35 membership fee you can join and take advantage of deeply discounted craft products, bundled buys, exclusive tutorials and product review videos, monthly challenges and much more.They offer tons of bundled products and bulk buys. So the more you shop, the more you save and the products are discounted 15-35% everyday. Sometimes even more! For a limited time, the membership fee has been reduced to $25 so if you want to take advantage of this great offer you can sign up here.

Springtime in Paris

I started off with a 12x12 canvas and primed it with a light coat of gesso. Then I adhered two large pieces of music sheet to the top right and bottom left corners. I spread my homemade texture paste all over the canvas, heavy in some areas and lighter in others.Love this stuff because it creates such great texture and small cracks
.

I used a damask stencil and Faber Castell Whipped Spackle to create even more texture. Then I used  Lindy's Stamp Gang Flat Fabio sprays in T- Bird Turquoise and Ocean Breeze Blue and sprayed it all over the canvas. Because the Flat Fabios don't have any shimmer, I mixed up some Finnabair Mica Powder in Teal with a bit of water inside a spray bottle. I sprayed this mixture onto the canvas and even created drips along the flower clusters for a shadow effect.  Next, I went over the top of the damask texture with Faber Castell's Texture Gems in gold. I just dabbed it over the tops with my finger to add a gold shimmer. You can also see  some of the stamping I did with Fiannabair's Messy script stamp and the spattering of paint I created.


The theme of the canvas is Springtime in Paris, so I made sure to include tons of flowers on my project. The tree branches are cut from chipboard using Tim Holtz's Bird Branch die. I cut off the bird and glued 3 pieces together. Then I painted them a dark brown color and painted a coat of white acrylic paint on top of that. I distressed the branches with a sanding block to reveal some of the brown underneath. The tiny leaves are from an old punch and the small pink flowers are by Prima. I love the way the flower clusters turned out. You can see bits of cheesecloth and lace peeking out and the gold berries really pop!


The Eiffel Tower image is from the internet. I printed it out and framed it with a small frame from my local craft store. I dabbed the once green frame, with white acrylic paint and more of the gold Texture Gems using my fingers. The little resin birds are Prima Shabby Chic treasures also dabbed with Texture Gems, this time in platinum. I love the sheen, the Texture Gems create.


Where there are flowers, there are butterflies. I stamped some butterflies on vellum and heat embossed them with gold embossing powder. Then I just cut them out and placed them throughout my canvas.


I spelled out "Paris" with some alpha stickers dabbed with acrylic paint. Then I added Finnabair's Art Ingredients Glass Bleads in Crystal to the bottom left corner. There is some on the top corner too, but it gets covered by the flowers.

Almost everything I used to create my canvas can be found at Craft Source. They are your go to shop for just about all your crafting needs. Take advantage of the limited time membership offer of $25 and sign up today! 

Thanks for stopping by today, and I'll see you all real soon!


Friday, April 24, 2015

Shabby Chic Castle

Hey guys! I just realized I haven't posted anything in over a month. I've taken on some new responsibilities and have been sooo busy!
Today I want to share a design team project that I created for Not2Shabby. This is actually my last month designing for Jamie's shop and I'm sure going to miss it. Jamie sent me an adorable set of stamps this month, including La La Land Crafts Sassy Princess Marci. As soon as I saw her I knew I had to do something involving a castle.. While perusing the aisles at my local craft store, I came across a castle birdhouse made out of wood and thought it perfect for my project.Check it out.

Sassy Princess Marci in her castle.

I painted the wooden birdhouse with Vanilla acrylic paint and Light Pink paint by Craftsmart. Then I used a stamp that resembled stone texture and Pumice Stone Distress Ink to stamp all around the walls of the castle.


It's very subtle, but you can see a little of the stone look, the stamp created.


I colored Marci's skin and hair using my Copic Markers and used gold Stickles on her crown.Her outfit was paper pieced using scraps from an old collection by Melissa Frances.


The flowers and vines along the castle walls were die cut using Magnolia Doohickey dies and cardstock. I really love the look of the vines against the castle walls.


I made a little flag for the top of the castle using my Spellbinders Banners die set and a bamboo skewer. Sassy Princess Marci comes with 3 sentiments and I chose the "once upon a time" sentiment to stamp onto the flag.I also created a mini flower bed out of a matchbox and some more Doohickey dies. Isn't it cute?


 Here's another full view from the side.

I think this piece would look so cute in a little girl's room or make for a cute centerpiece for a Princess theme party. Too bad my little one has outgrown her princess phase.

Head on over to Not2Shabby and don't forget to use discount code "LIZRUSELL" to get 10% off your purchase. Jamie always has the cutest stamps at amazing prices.
Thanks for stopping by and I'll see you all real soon!

Friday, March 20, 2015

Pretty Magnolia Tag made out of Packaging Material

Hi guys and welcome back to my blog! Today I want to share with you a great idea on how to turn you embellishment packaging into pretty tags. Whenever I open a new package, I'm always looking for ways to re-purpose the packaging. Whether it be cardboard, plastic, netting, etc. The backing material on some of the embellishments, come in great shapes and can make for awesome tags. I've created a beautiful Magnolia tag out of Prima packaging as my design team project for Not2Shabby.


Turning your packaging into a pretty tag is quite easy. I always look for packaging that has a neat design or details, such as eyelets, as my base. Then you simply trace the packaging onto designer paper of your choice. Cut it out and adhere to both sides of your packaging material with your favorite adhesive.


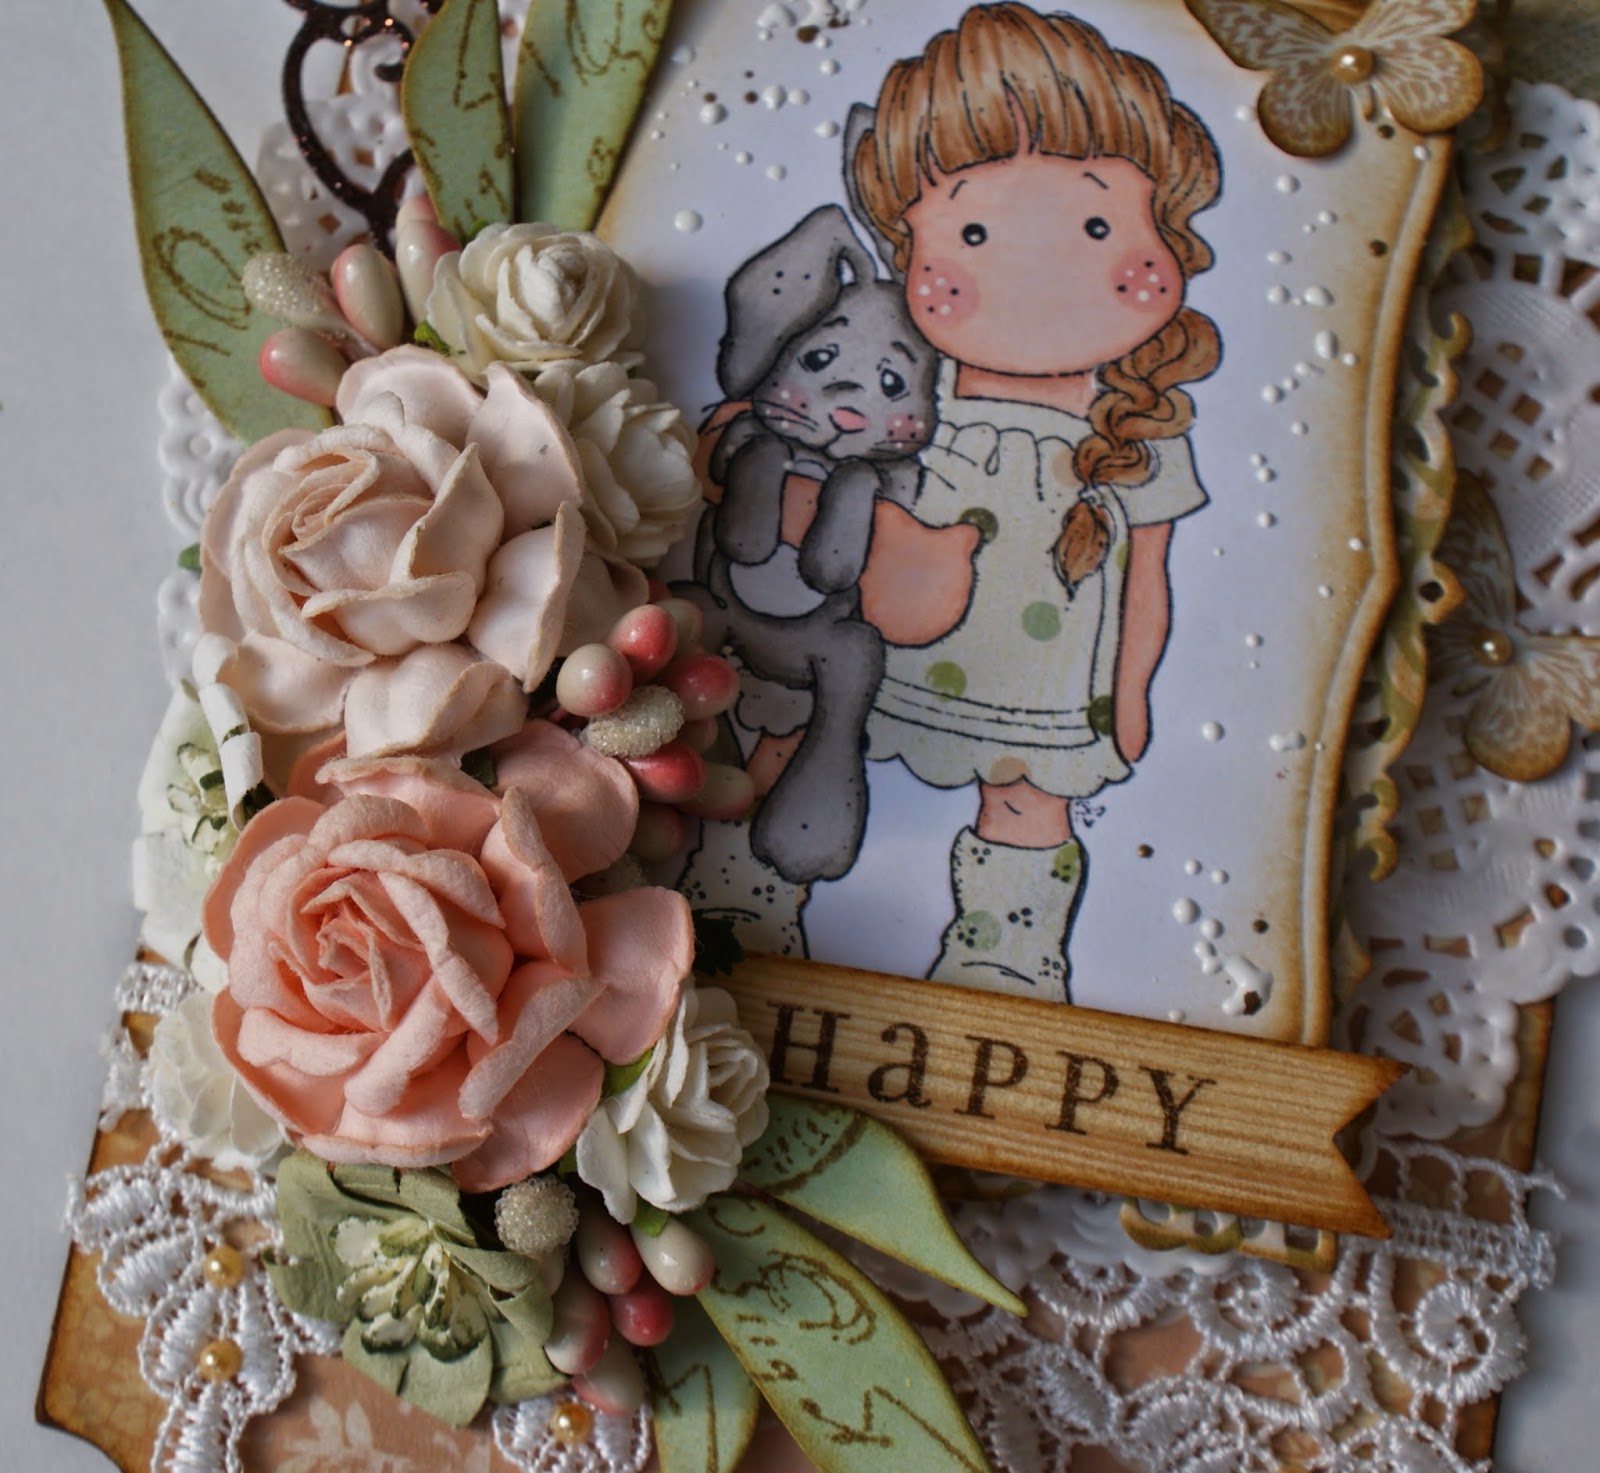
So here's the pretty tag I created using the sweet Magnolia image. It's called Tilda with Hanging Rabbit and you can purchase it here. I've used Colorbok's Victorian Parlour collection to cover the tag and inked all the edges with Brushed Corduroy Distress Ink. I also busted out my Doohickey dies and some pretty laces I had in my stash.


I colored the image with my Copic markers and I paper pieced her dress and boots. I also added Frantage in Shabby White around the image for more detail. It's my first time using it and I love the way it looks!


The flower cluster turned out so pretty. I just used flowers from my stash and these cute little pips I picked up at my local craft store. The leaves are from the Doohickey Club Dies Volume 4 and I stamped on them and inked them with Brushed Corduroy. The wood banner has been in my stash for ages and I thought it would make for a perfect sentiment on my tag.

I hope I've inspired you to look at your "trash" in a whole new way. I think I'll be making a few more of these tags!
Head on over to Not2Shabby and take advantage of Jamie's flash sale going on now until Sunday March 22. Almost everything in the store is 10% off and if you use Discount Code "LIZRUSSELL" you will get an additional 10% off your purchase. What a great deal!

Thanks for stopping by and I'll see you all real soon!