Wednesday, July 30, 2014

Fun Birthday Card

Hey guys! Today I've got a short post for you. Just wanted to share the card I made for my sister's recent birthday.


Isn't it cute! I used MME Sky's the Limit 6x6 paper pad and the colors and images were just perfect for the look I was going for. 


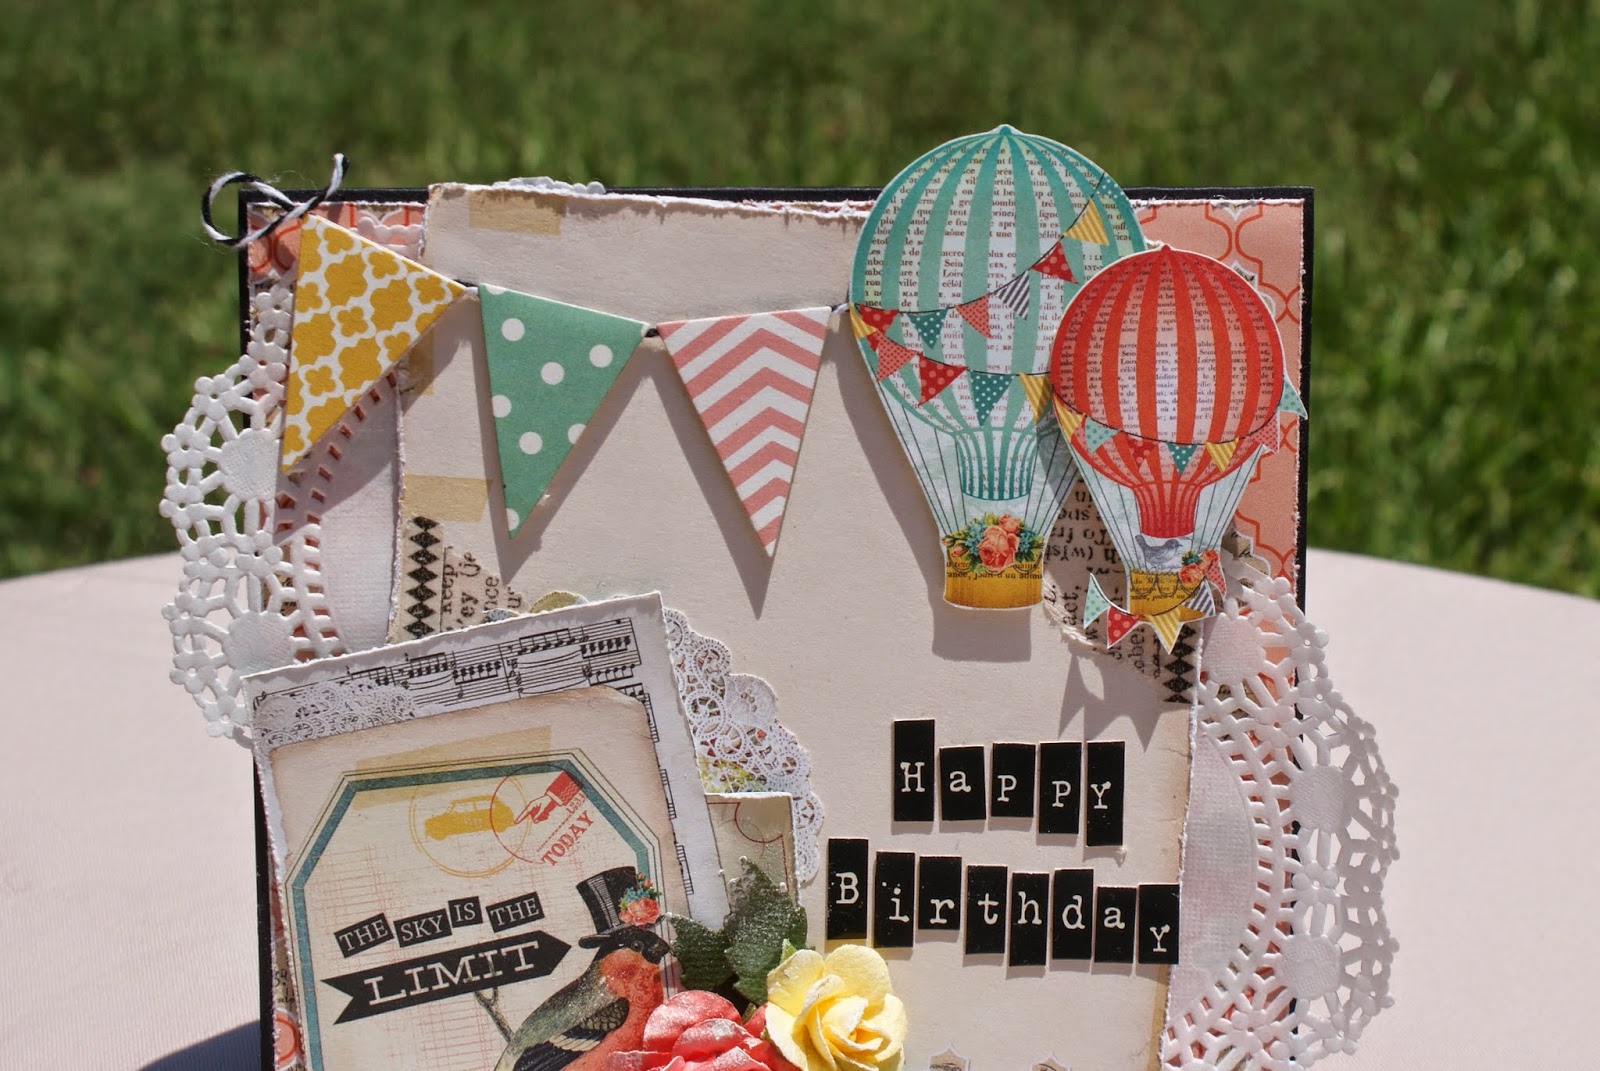
I love the hot air balloons and the fun colors. The little pennants were die cut from scraps using Spellbinders Banners die set. All of the paper edges were lightly distressed with Tim Holtz distress tool. I also cut a paper doily in half and tucked the piece in between layers of pattern paper. 


I fussy cut a few images from the paper pad and layered them on the bottom corner over the pieces of tissue tape I used in the background. The flowers were all from my stash and were lightly sponged with warm white acrylic paint. The little leaves were die cut from green card stock and tucked into the cluster. I used alpha stickers for the sentiment and I love how they coordinate with the words beside the little bird image.

This card was a lot of fun to make and my sister loved it! hope you like it too!

Thanks for stopping by. I'll see you all real soon!


Monday, July 28, 2014

12 Tags of 2014, July

Hey everybody! I'm back to share my tag for the month of July. I fell in love with Tim's tag as soon as I saw it and knew I just had to make the time to create my own . Being from Southern California and all, I can't help and be in love with anything beach theme.Since I've moved to Texas,  I think the beach is the one thing I truly miss from Cali...that and the gorgeous weather.


I stayed pretty true to Tim's version and had to purchase the Sand and Sea dies ( any excuse to get new goodies will do) . The background of the tag was created with a combination of Distress paints, stains and inks. The edges are distressed and inked with Frayed Burlap.


I didn't have Shrink Plastic so I just used a piece of plastic packaging and embossed it with the Swirls Texture Fade. It reminds me of waves so it was perfect for the ocean theme. I inked the sea horse with Spiced Marmalade, Rusty Hinge and Barn Door Distress Inks. I also used Rock Candy Crackle and then sprinkled some gold embossing powder on top. I think he turned out awesome!


I followed Tim's recipe to create the "sand" and I've got to say it looks just like the real thing. And it didn't flake off! I'm definitely going to use this technique again. The sand dollar and starfish were painted with distress paints and then sprinkled with gold embossing powder. I also used Distress Stickles on the starfish for added texture.

I had so much fun creating this tag and can't wait to see next month's tag.
Hope you are all making the time to participate in the monthly tags.

Till next time, have a great one!!!

Tuesday, July 8, 2014

Bo Bunny Country Garden Altered Frame and Birthday Card

Hello there! I'm back to share some more projects with you all!
Last week, my sweet, wonderful mom celebrated her 64th birthday. She is a huge fan of anything from " I Love Lucy" and collects the Lucy Barbie dolls, so my husband and I ordered some dolls online. Unfortunately, they would be arriving a few days after her birthday. I didn't want her to not have anything to open on the big day, so I decided to alter a frame for her. She loves to display pictures of her kids and grandchildren all over her room and she just loves when I make her stuff. She loved it! And immediately found a picture to put in it.


I started off with one of those $1 frames from Michael's and painted the sides a warm white. Then I covered the frame with Bo Bunny's Country Garden papers. I distressed the top piece by tearing random pieces and inking the edges with Walnut Stain Distress Ink. I also used my Martha Stewart punch to punch out border strips that I tucked in between papers.


The wooden dressform is from Sacrafter's shop and I left it natural. I just made  a "dress" from one of the pattern papers and added a piece of strung pearls for a necklace. And just look at those flowers! Aren't they gorgeous? The big blue one was gifted to me by Sa and the pink ones are from my stash. They were originally white but I colored them with Heidi Swapp's shine spray in Blush. 


I added Diamond Dust to the tops of all the flowers and tucked pieces of white tulle in my flower cluster, for added girliness! ( Is that even a word?) I also cut apart an Easter pick and used the berries to accent the arrangement. The leaves were die cut with one of the Spellbinder's Foliage dies and pattern paper.


Love these little wooden sentiments from Michael's. They come white and are so shabby chic. Perfect for my frame!


I also made a coordinating card to go with the frame. This was my first time using the Spellbinders Resplendent Rectangles dies, I've had forever.They are sooo pretty! Then I just added a Kaisercraft wood frame and some pearls for accent. The banner was fussy cut from one of the pattern papers and then stamped with "Happy Birthday".


Here's the two pieces together. I think they turned out so pretty and shabby! My mom loved them both and I loved watching her smile when she opened them. Let me know what you think. I really appreciate your sweet comments.

Have a wonderful day!

Sunday, July 6, 2014

Graphic 45 Steampunk Debutante Shrine

Hi everyone! I almost forget to share one of my favorite projects with you all. I made a Steampunk Shrine a few weeks ago, but had been too busy to post and then I simply forget all about it. So today, I saw it in a corner, covered with scraps from other projects and thought I'd share it ( before I forgot again, hehe).


I started off with Sacrafter's Gears Shadowbox and covered it with Graphic 45's Steampunk Debutante papers. The gears were painted with metallic puffy paints and distressed with black gesso. I simply dabbed the gesso on top and then rubbed some off with my fingers. This creates a cool, grungy affect.I did the same technique on the chipboard pediment from Tim Holtz.


Look at the pretty Steampunk lady inside. I fussy cut several images and layered them over one another to decorate the inside of my shrine. 


I love the way the sides turned out. Again, these are all fussy cut pieces just layered together to create this design. It sort of reminds me of Tattoo art, don't you think?


From this angle, you can see some of the fussy cut images inside. It's hard to see all the details but there is a lot of layering going on.


The feet of the shrine are empty bullet casings adhered with E6000. I used my fingers and dabbed some of that coppery puffy paint and then grunged them up with the black gesso. I think the feet look so cool!!!


And here's the back of the shrine. I used one of the Steampunk frames and added mini gears to her hair. I also added glossy accents to the mirror eye to give it a realistic look. Then I just added a fussy cut butterfly to the flowers on the bottom left hand corner, and that's it.

Being a lover of all things Steampunk, it's only natural I fall in love with this piece. Almost everything I make ends up in someone else's home. But this puppy is all mine and I can't wait to add it to my display case! Hope you all like it as well and thanks so much for stopping by!

I'll see you all real soon...