Sunday, March 30, 2014

Prima Lyric Shabby Chic Projects

Happy Sunday everyone! I'm in such a great mood today because we finally get to see the sun! It's been raining for days without even a glimpse of sunshine.  I probably shouldn't complain too much since I know some of you are still seeing snow, but I'm just so tired of the gloom. Well, at least the rain kept me from going out and I've been pretty busy crafting and catching up on my to do lists. I have a few sweet friends who recently celebrated birthdays and I've been trying to finish their gifts so I can send them off. But as soon as I finish gifts for one, another has a birthday coming up! So I'm never on time sending my gifts, but better late than never, I always say.

My friend is such a talented crafter and she inspires me so much with her beautiful shabby chic projects. She's got shabby chic down to a "T" so I thought I'd give it a go and create something shabby just for her. So here goes....


I made a cute little easel card using Tim Holtz's Baroque Dies and the Prima Lyric collection, one of my faves. The flowers are all from my stash and were dabbed with glue and sprinkled with Diamond Dust. Once the glue dried I sponged some Snow-Tex on the tops of the flowers. This creates a beautiful shabby look and adds texture to the flowers as well.

 
I just love creating my own crinkled seam binding bows. I topped this one off with a ribbon buckle and flat back pearl.


I also altered a TP roll. I've never made one before and I think this is such a clever way to present a little gift. I'm going to add some metal charms inside an organza bag and tuck it inside the roll. So cute!


Love the way this chipboard wall hanging turned out! I had picked up the chipboard die cut at a scrapbook expo and now I'm kicking myself for not having bought more. Don't you just hate that?
The whole thing is covered with pattern paper and I fussy cut images from the collection and used them as embellishments.

 
 I often call my friend the "Shabby Chic Queen" so I thought this would be cute to add to the wall hanging. I love the font and glitter on these Recollections Alpha stickers.


Last, but not least, I altered a wooden box from Michael's. I whitewashed the inside of the box and adhered all my papers down with Mod Podge. I then used a Heidi Swapp stencil and some color sprays and a second stencil and modeling paste to create layers. Some lace, flowers and fussy cut elements round out the look of the box.

 
 The mesh screen on top of the box is the reason I bought it. It reminds me of a bug catcher box, but looks like all my butterflies got loose, lol.

 
 Here's the back view of the box. The hardware was alcohol inked with silver and then sponged with Snow-Tex to coordinate better with the papers and look of the box.

 
Side Views of the box....
 
 
Inside view of box...


Well, that's all folks! Hope you like my projects and please come back to visit real soon!

Monday, March 17, 2014

12 Tags of 2014, March

Hi guys, welcome back!
 So at the beginning of 2014, I told myself that I was going to start participating in Tim Holtz's  monthly tags. I had every intention of following thru on that promise,( I really did)  but life sometimes gets in the way. Needless to say, I missed out on the January and February tags but wasn't going to let March get away from me. And I'm so glad I took the time to create my tag(s) because they turned out awesome! If you aren't participating already, you really should consider getting started. It's never too late and I just love all the tips and techniques that Tim teaches us each month.Well, enough rambling...check out my take on the March Tag of 2014.

 
 I didn't have many of the products that Tim used for his tag, so I had to improvise. But, to be honest, that's actually the best part, because you end up with a  really unique tag. I used Steampunk CMS107 stamp set for the main images and a couple of random stamps from my stash.


This month's technique was smudging. You stamp your inked image onto one tag first, and then without re-inking, stamp again on a second tag. Then you immediate smudge the images using your  ink blending tool. You can see the smudging much better in the close up above. Pretty cool, huh? I used a stencil from Heidi Swapp and Lindy's Stamp Gang color spray in Tiffany Blue, concentrating on the upper right hand corner.


I  applied turquoise paint onto the word band and then rubbed it off with my finger. This step really helps to bring out the words in the band.. The jute string was stained with Peeled Paint Distress ink and I dabbed more of the turquoise paint on the edges of the tag. And viola... two really cool Steampunk inspired tags!

I had so much fun creating these tags that I couldn't stop there and thought I'd catch up on the two I missed.

Here's my take on the January tag:

 
It's almost identical to Tim's tag because I practically had every product he used. Of course, I changed it up a bit to make it my own. The chit chat stickers reflect what's important to me and the "R" on the charm further emphasizes that notion.. It's my family name!
 
My take on the February tag:
 

Again, I had to work with what I had on hand, but I just love the way it turned out! The arrow and scalloped edge were created using foil tape over cardstock. I then applied black gesso over the die cut pieces and rubbed some off with my finger to create a grungy look. I did the same thing on the wings except  they were die cut out of grungeboard. I used a toothpick to create the "feathers" and then added the black gesso to accent the wings. LOVE it!!!
 
Well, that's it for today's post. I really hope you like my tags and you really should consider joining in the fun each month. You not only get to  create an awesome tag but you may also win a prize if you upload your tag to Tim's blog. I'm on my way to do that now!
 
Have a wonderful week everybody! I'll see you all real soon.

Friday, March 14, 2014

Graphic 45 Design Team 2014 Audition

Hi everybody!
Well, here I go...I mustered enough courage to audition for Graphic 45's design team! And let me tell you, there were plenty of sleepless nights just thinking about it, LOL. It's no secret that I am in love with anything Graphic 45 and it would be a dream come true to land a spot on their amazing DT. So wish me luck!

First off, is my latest project using the Sweet Sentiments collection. I wanted to create an Easter centerpiece for my buffet. So, I found an old clay pot in my garage and I covered it with embossed strips of paper. I then created a pretty little field of flowers on top featuring the sweet little girls in their Sunday best. The Easter tree was created using some branches I found in my yard and I created 3D eggs using Spellbinders Ovals die and pattern paper. Lots of fussy cut details were added to make this sweet scene come to life.


I even created a cute little nest and made some little eggs out of clay. Details, details, details...


Up next, is my favorite Halloween piece using Steampunk Spells. I had such a blast creating this printers tray. I covered the entire tray with a sand and acrylic paint mixture to create this awesome texture. Then I dabbed some white paint in random spots to make it look like it was charred. I think it turned out awesome!


I'm always looking for unique items to recycle into art. This next piece was created out of a plastic case that came with my ipod. The shape was similar to an Altoids tin and I knew it would be perfect for my Once Upon a Springtime fairy scene.


Here's my Jules Verne's " 20,000 Leagues Under the Sea" inspired canvas incorporating some Steampunk Debutante. I created the background with torn book pages, tulle, gesso, modeling paste, paint and color sprays. The cutout represents the submarine window looking out into the depths of the sea. There's even a light inside and when lit you can see the fish swimming by. Pretty cool, if you ask me.


Secret Garden is such a gorgeous collection. So here are two projects showcasing the beautiful papers. First up, is my vintage display cabinet.


And here's a sweet banner pennant card.


I know we only have to show 6 projects but it's so hard to pick out favorites when I love them all!

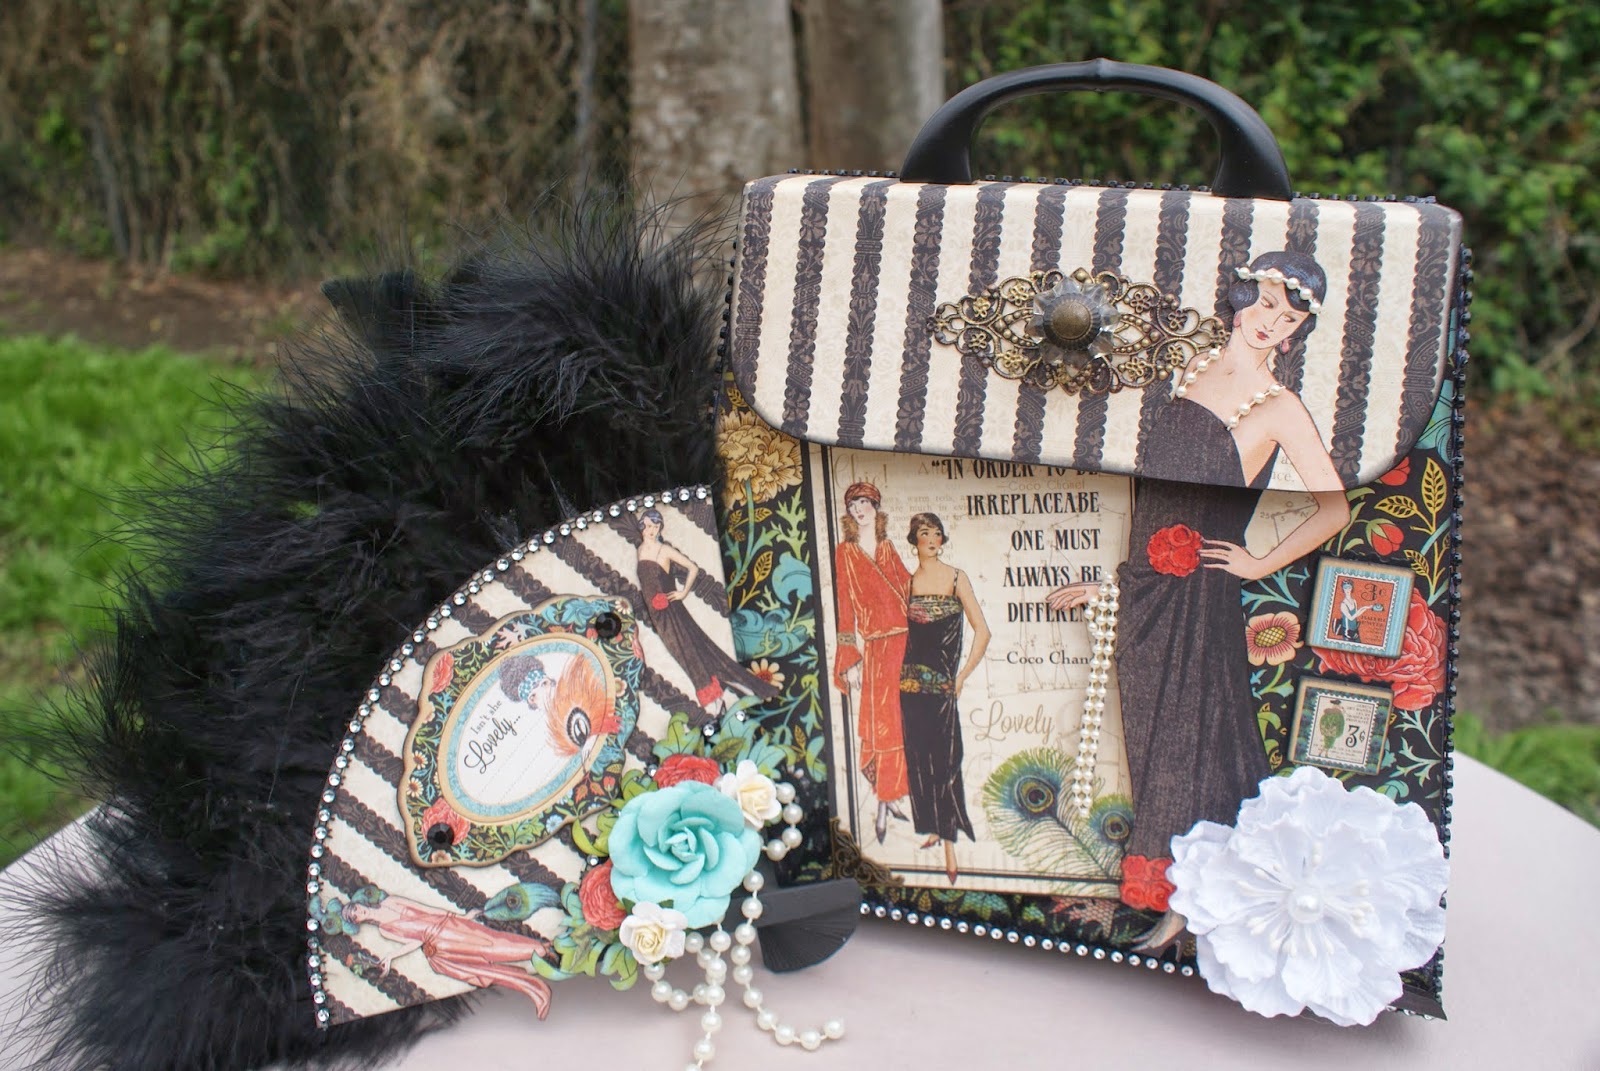
Couture Purse and Fan:


Ok, ok, last one I promise,

Well, that's it guys! Sorry it was a long post but I'm a sucker for details and I just couldn't pass up the opportunity. Now, to wait patiently ( yeah right). I probably won't sleep for days!

Thank you so much for stopping by. I'll see you all real soon!

Sunday, March 2, 2014

My Official Blog Launch !!!!!!

 
It's official, I have my very own blog!!! Woot, woot!
This is a big deal for me, because I am not technically savvy(at all) and was so intimidated to start blogging. But with a little help ( ok, a lot)  from my teenage daughter and awesome hubby I am now ready to embark on my blogging adventure.
So for my first post, I want to share with you the projects I created using the March card kit from DiscountPaperCrafts, on etsy. My eight year old daughter, Kaylah and I are part of a mother/daughter design team for this amazing shop. Cathie, the owner, puts together the most beautiful kits each month and Kaylah and I always have a blast designing with them. This time around, we created 4 cards and a large tag featuring Authentique's Flourish Collection and lots of gorgeous flowers. And there's still plenty left in the kit to create more! So, enough babbling...on with the show.


I just love the way this card turned out! The pleated canvas trim by Bo Bunny adds such a great touch to this card, don't you think? The bright, cheery colors of the Flourish collection instantly made me long for Spring, hence all the flowers and the butterfly.


Would you believe Kaylah designed this card all on her own! She picked out the papers and the dies she wanted to use and how she wanted to incorporate them on the card. I just helped glue things down ( she thinks that part's boring). The branch is by Spellbinders and we inked it and used Distress Embossing Powder in Vintage Photo to give it a realistic look. I think she did an awesome job. I'm so proud of my baby!


This one's Kaylah's favorite! I think it came out so cute. That floral pattern paper was the inspiration behind this card. It made me think of wallpaper and so I wanted to create a little room if you will. I picked up that cute wooden chair at Michael's and inked it with Vintage Photo and added a "cushion" using the pattern paper. I created the wainscoting by scoring a white piece of cardstock and added braided trim for the chair rail. We even created our own wall art using a wooden tile piece and some stamps that came in the kit. Some flowers and pearls finish off the card nicely!


We layered lots of pattern papers on this one and used some punches to add interest to the edges. Love that lattice die cut by Spellbinders! We colored our own seam binding with Lindy's sprays and added flowers and a doily. Both the butterfly and the acrylic sprays are from our stash.


We used the packaging of the Bo Bunny button pack to create our tag. We just adhered paper to both the front and back and used the stamps, along with white embossing powder to create our background. The white really stands out against that bright pink paper, love it!!! We used the frame stamp and stamped it on the back of one of the pattern papers and then fussy cut it out to serve as our focal point. There's that gorgeous canvas trim again! I love the way the pearls look over the canvas!


Well, I really hope you enjoyed my first post and I encourage each of you to go check out Cathie's shop. She has an amazing selection of all the latest scrap goodies at unbeatable prices. And of course, this amazing card kit; http://www.etsy.com/listing/177694519/march-cardproject-kit-featuring?ref=shop_home_feat_1

 DiscountPaperCrafts; http://www.etsy.com/shop/DiscountPaperCrafts?ref=l2-shopheader-name

I'll see you all real soon!