Wednesday, April 30, 2014

Chocolate Ribbon Cupcake & Cupcake Birthday Card

Hey Guys! Got a couple more projects to share with you today. I actually made these a few weeks back but haven't had a chance to post on my blog. Still playing catch up, as you can see.
A dear friend of mine celebrated her birthday recently by hosting a super fun challenge on Youtube. She asked everyone to make her a cupcake or anything depicting sweets. I guess we know what she's craving. She is 8 months pregnant after all, lol. I had never made a cupcake before ( well not one made out of paper) so I jumped at the challenge. And believe me it was! I don't understand how something as easy as making a cupcake liner could be so hard. But it was for me! I was having such a hard time getting the liner to adhere to my cup base. Too much of a perfectionist I guess. So after 3 botched tries, here's what I came up with.

 
Chocolate Ribbon Cupcake
 
I used a paper cup as my base for the cupcake. I cut it to stand 2 inches tall and adhered the scored liner to it with hot glue. The cupcake liner is 2 strips of paper, scored at 1/4 and glued end to end. I added a bit of lace and some pearls at the bottoms because I didn't want it to look to plain and I placed my cupcake on top of a die cut doily. I just love the way the brown satin ribbon looks like real chocolate. Almost good enough to eat huh? A few pearl " sprinkles" and a "cherry" on top finish off my sweet cupcake.


Cupcake Birthday Card
 
Inspired by my chocolate cupcake, I decided to create a coordinating card. I used the leftover scored strip from my cupcake and punched one edge with my MS punch. The top of the cupcake was created with a bunch of little punched out flowers using brown cardstock. I then added small pearls as sprinkles and topped it off with a pink flower sprinkled with diamond dust. I love the cute sentiment too! It's a Stampendous stamp I picked up at Michael's. It was just perfect for my card.


 Here's another view of the card. You can see I finished the inside as well. I kept it pretty simple so I can have lots of room for my message.
 
 
And here are my 2 cupcake projects side by side. I think they turned out real " sweet" and I hope you like them as well. My friend got a kick out of them and that always puts a smile on my face.
 
Until next time, my friends. Take care and I'll see you all real soon!


Sunday, April 27, 2014

Kaisercraft Altered Dressform & Shabby Chic Card

Hello there friends! I'm back to share some new projects I created for a dear friend. She recently celebrated her birthday and is also in the process of redecorating her craft space. So I thought it would be perfect to create a décor piece that will fit right in with her new décor.


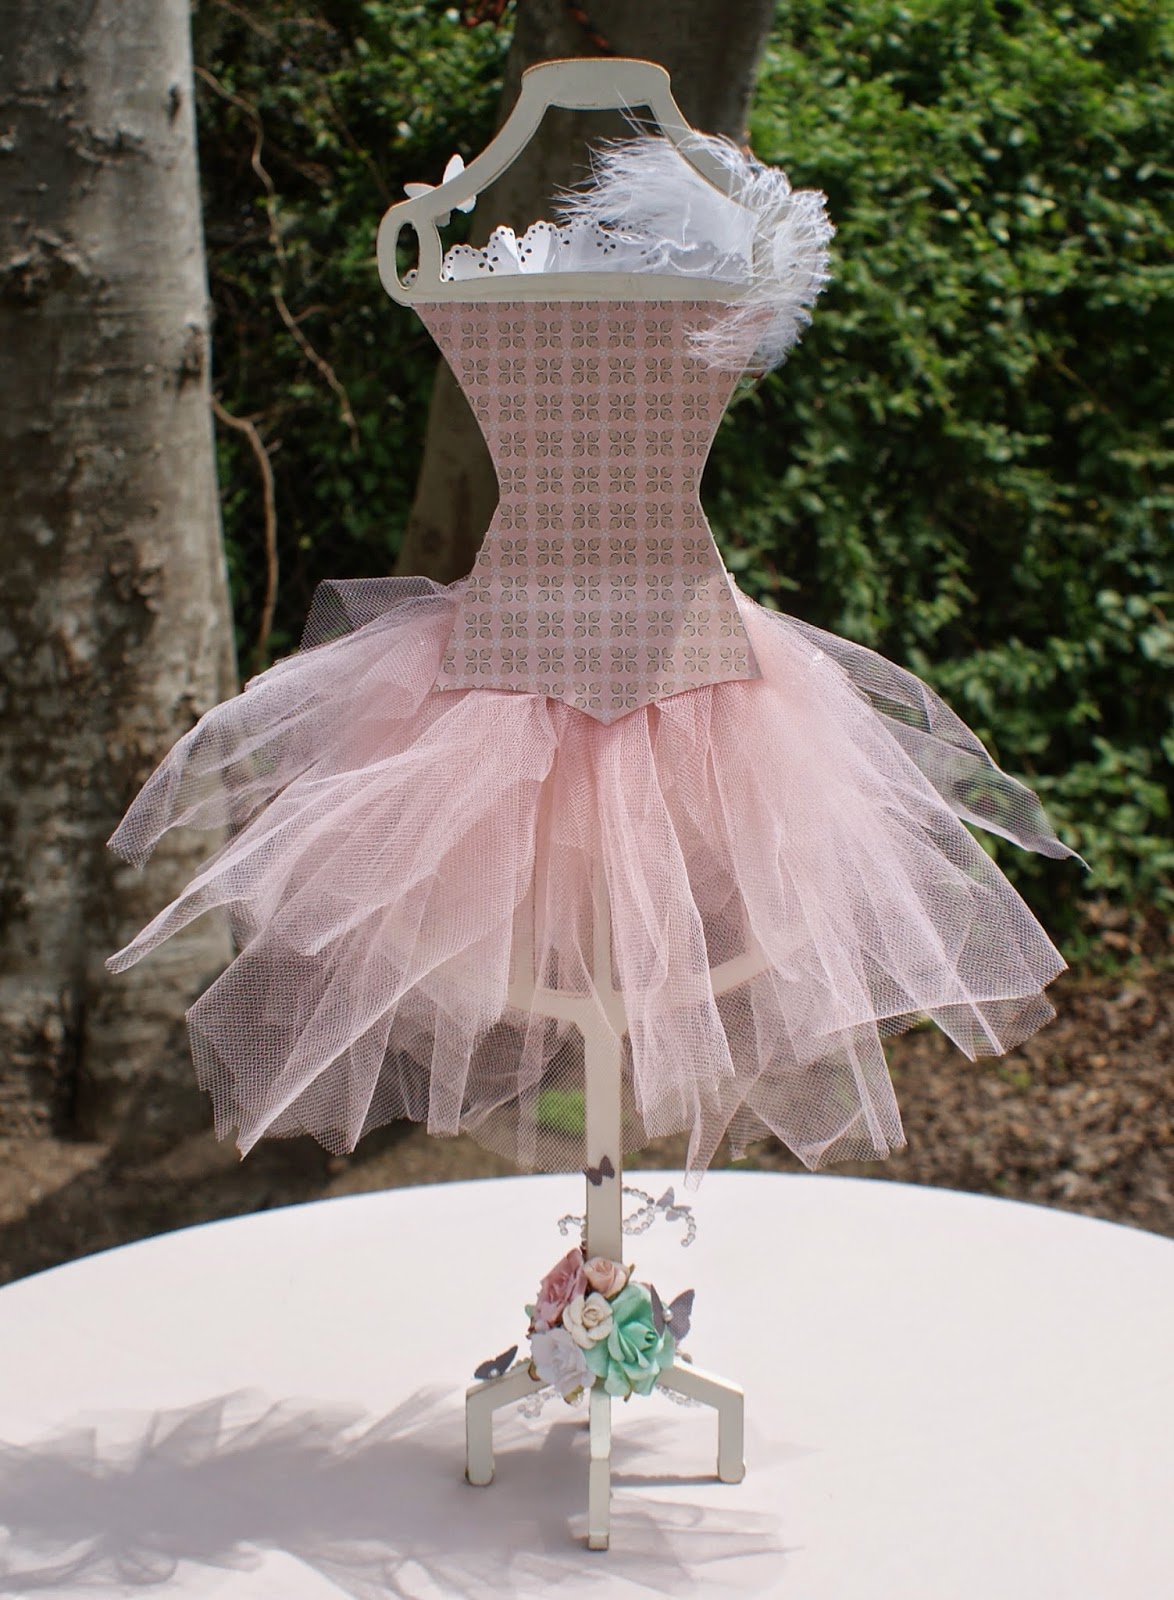
Ta-da! My Shabby Chic dressform!
 
I've had the Kaisercraft dressform for a while now and it was just begging to be altered. I gave it two coats of warm white paint and I sanded all the edges to give it a worn look. I used the "On this Day" paper collection, also by Kaisercraft, to create the pretty little corset.
 
 
I created the skirt out of pieces of gathered tulle. I only had white tulle so I colored it using Heidi Swapp's Color Shine spray in Blush. It is the perfect shade of pink and complimented the papers so well.
 
 
Here's a close up of the corset. Omg, those eyelets were a pain in the butt to set but I'm so glad I took the time to do it. They're the perfect touch!  I had to color that ribbon as well since I didn't have it in the right color. I just used a combination of Lindy's Stam Gang Sprays to get the right color. And just look at all those little rhinestones! Now that took some patience,lol. They are so tiny and I had to use a dab of glossy accents to adhere them on. It's all in the details!
 
 
I even finished the back.
 
 
 I kept the base pretty simple. Just added some dyed flowers, some pieces of bling flourish and cute little punched out butterflies. Pretty cute huh?
 
 
Now, you can't give a gift without a pretty card right? And as always, I like to coordinate my card to the project I've created. The card measure 5 1/2 x 51/2 and has several layers. The wooden piece in the center is from Michael's and I left it bare, since I really like the look of the wood. The colored flowers were dyed using color sprays I had on hand.
 
 
 Here's just another look at the card. You can see I finished the inside as well.
 
 
Here are the two projects together. I just love how they coordinate.
 
Well, that's all for today. I really hope you liked my projects. I had so much fun creating these for my friend. She smiled so big when she opened her package and that in itself is the greatest gift. Hope you all have a wonderful week and I'll see you all real soon!


Saturday, April 19, 2014

12 Tags of 2014, April

Hey everybody! I feel like it's been a while since my last post. I've been doing a lot of crafting and I do have some new projects to share with you, but just haven't found the time to sit down and post. Work and family keep me pretty busy if you know what I mean. So here I am, trying to catch up...
I did manage to find the time to create my April tag with time to spare before the deadline. Tim did a beautiful job with this new tag. It's a little softer than the usual but oh, so pretty! And perfect for Spring.

My take on the April Tag


 I usually work with what I have on hand since I don't always have all the supplies Tim uses. But, I couldn't help myself and I ordered the new Frameworks Trellis die. It's what makes the tag special. How could I not have it, hehe. I'm so glad I did ,so many possibilities with this die.
 
 
I followed all of Tim's steps but used different color inks and paint for my background and on the trellis die cut. If you look closely at the die cut inserts, you can see where I used Tim's Seasonal Paper. I just had to incorporate those cute Easter bunnies into my tag.
 
 
This was my first time using my Tattered Pinecone die, can you believe it. I've had it forever and haven't touched it! That's what I like about making these tags every month. It gives me an opportunity to use some of the older things I have in my stash. I really like how my roses turned out but I felt the little cluster needed something more, you know. So added bits from an Easter pick and just tucked them here and there among the flowers. Perfect for Easter!
 
I had so much fun creating this tag and can't wait to play again next month. If you haven't participated, you should really consider joining in. You won't be disappointed.
 
I hope you all have a wonderful Easter and I'll see y'all real soon!


Tuesday, April 8, 2014

DiscountPaperCrafts April Card Kit

Happy Tuesday everyone!
I'm looking outside my window right now and boy, is it gorgeous outside! Makes me wonder what I'm doing inside typing on this computer,lol. I literally can hear birds chirping and everything looks so green outside. The trees have gotten all their leaves and my roses are starting to bloom. I can't wait to see in them fully bloomed, in all their glory. I just know they're going to be gorgeous!
You know what else is gorgeous? The April Card Kit from DiscountPaperCrafts, of course! Cathie put together another beautiful kit and Kaylah and I had so much fun working with it. The kit features Kaisercraft's Telegraph Road paper pad and the coordinating collectables. The collectables make it so easy to put together fabulous cards and tags. You also get flowers, trims, Cheery Lynn doily die cuts and even the cardstock! It truly is a complete kit all on its own. We barely had to reach for our stash to complete our projects. Let me show what we created.

 
Just look at everything we made with the kit: 3 cards, 1 tag, and 2 favor boxes. And there's still plenty more paper left to create more!


These are the two favor boxes we created. I love the size of them and they are so simple to make. A few die cut pieces on top is all the embellishment they needed, since the paper is so pretty.
 
 
We filled our boxes with shredded tissue, added some mini cupcake liners and filled them with sea salt caramels. But, you can fill them with whatever you like. I think these make for a cute little gift.
 
 
Here's the first of our cards. It measure 5 1/2 x 5 1/2. We layered several pieces of pattern paper and used lots of die cuts from the coordinating Collectables pack. I love how the Cheery Lynn doily accents the sweet sentiment die cut. Some pretty flowers and die cut leaves add a cute touch.
 
 
This card turned out so pretty too. I love the pops of red and the sweet little bird die cut.
 
 
 Our last card was the easiest to make. We didn't want to cover up that cute cluster with the bird and vintage phone. So we fussy cut it out from a second piece of pattern paper and used foam tape and adhered it to the card to give it a 3D look. I created a few little banner pieces using some scraps and added a border strip on top. I just knew I was going to use that sentiment for this card because of the phone. So cute!
 
 
Last, but not least is our tag. We created the tag out of some leftover cardstock and covered both the front and back with pattern papers. Kaylah really wanted to use the other Cheery Lynn doily and so we cut it in half and placed it on the left of the tag. Then we added some flowers and die cut leaves to create a little cluster. Some more die cut Collectables and pearl string complete the look of the tag.
 
We hope you like what we've done with Cathie's wonderful kit and we really encourage you to get your hands on one. Cathie always puts together the best kits and this one is just jammed packed with goodies. You really don't need much else to create beautiful projects. You can purchase your kit here:
 
Thank you so much for stopping by and we hope to see you real soon!