Showing posts with label Distress Stains. Show all posts

Thursday, February 12, 2015

Tropical Shadowbox for SaCrafters

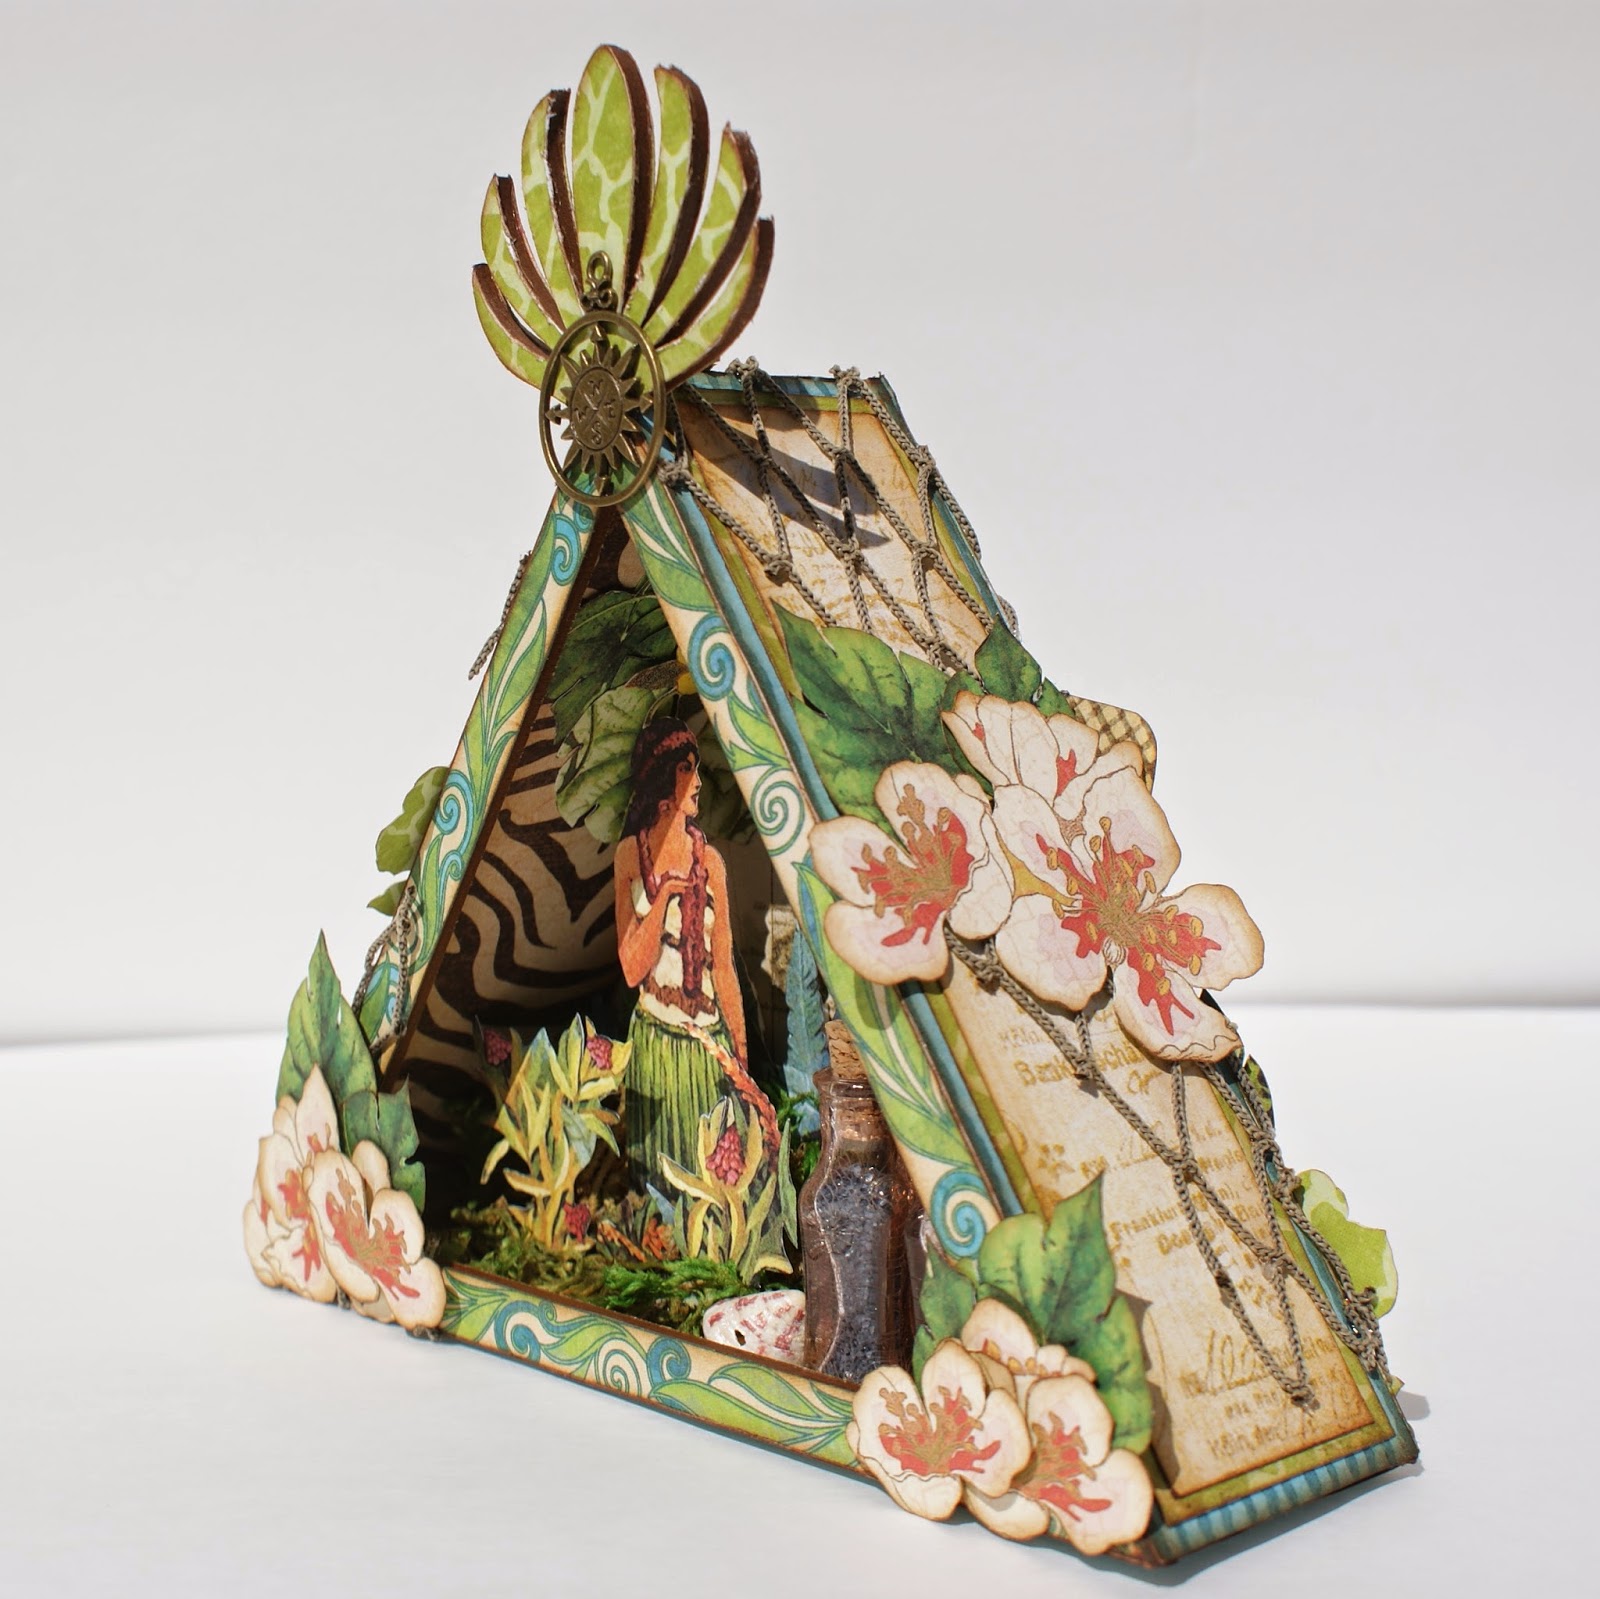
Good morning friends! I've been asked by the ever talented Sa, owner of SaCrafters, to be a guest DT member for the month of February. Sa designs creative and functional alterables out of wood, mdf, and chipboard. She sent me some great pieces to work with and today I'm going to share the first of four projects.


This is the Triangle Shadowbox available in her shop. As soon as I saw it, it made me think of the "Tropical Travelogue" collection by Graphic 45. I just knew it would be perfect for this project.


Inside, I created a tropical 3 dimensional scene. I did a lot of fussy cutting and layered all my pieces with foam and bits of moss.


The small glass bottles were brushed with Clear Rock Candy Crackle Paint and stained with Vintage Photo Distress Stain to give them a weathered look. I then filled them with different colored sand and added sea shells around them.

.


For the sides, I added bits of decorative netting and fussy cut flowers and leaves from the paper collection.


This is the back of the shadowbox. I simply layered some fussy cut elements to create a sort of collage.

I just love the way the shadowbox turned out and I think it would be a great way to display mementos from your tropical getaways.

Head on over to SaCrafters shop and check out an amazing selection of wood, and chipboard products, as well as stencils. You can use discount code "lizfans" for 10% off your purchase of $30 or more. The discount code is good for the entire moth of February.

Thank you so much for stopping by! Hope you all have a wonderful day!

Monday, December 15, 2014

12 Tags of 2014, December

Welcome back! Today I want to share with you my take on Tim Holtz's December tag. It has been so much fun participating in the monthly tags and I'm so proud of myself for playing along  each month. Well...I did miss August and September, due to my move, but I won't tell anyone if you don't, hehe. The tag for December was amazing , like all of Tim's tags! Again, I was without a lot of the products he used, but it's always fun to work with what you've got. So enough babbling, let me show you what I came up with...

December Tag

It's very different from Tim's but I think it turned out rather cute. I created the background with a combination of Chipped Sapphire and Weathered Wood Distress Stains for a dark winter day look. Then I embossed a piece of Frosted Film (didn't have the new Frosted Sheets) with a snowflake embossing folder from my stash and adhered it to my tag. I love the shimmery effect of the frosted film and the subtle embossing. To create the look of snow, I splattered white paint on the surface and dabbed Snow-Tex all over the tag.


I hope you can see the shimmer and the embossing from this angle. Believe me, it's there and looks gorgeous in person.


I don't own the Prancing Deer die so I used one of the deer from Reindeer Flight. I cut out 3 deer out of chipboard and glued them together for dimension.  The deer was colored  with light brown acrylic paint mixed with Antique Linen,then I sanded and inked the edges with Walnut Stain. I did add Distress Glitter in Rock candy and dabbed Snow-Tex on the deer to make it look like falling snow.
As for the greenery, I used the branches from the Tattered Pinecone die. I cut them out of watercolor paper and used Peeled Paint Distress Stain to color them. Then I just lightly sprayed them with a shimmery silver spray from my stash and dabbed some Snow-Tex ( can you tell I love this stuff)?
 

The branches are from the Branch Tree Die. I cut three out of chipboard and layered them for dimension. Then, I inked them with Walnut Stain and heat embossed them with Walnut Stain Embossing powder. This is my favorite technique to create realistic looking branches. You can see more of that snowy stuff on my branches and one last, little green leaf just clinging on for dear life. The scene really does look like a Winter Wonderland and makes me long for a white Christmas. I topped of my tag with a crinkled ribbon bow dyed with the stains used to color the tag.

Well, that is it for me today! I had so much fun creating this month's tag and there's still plenty of time to play along, if you haven't already.

Can't wait to see what Tim comes up with for the New year.
Thanks for stopping by!

Monday, November 17, 2014

12 Tags of 2014, November

Hi all! I'm back to share my take on Tim's November tag. I'm so proud of myself for not waiting till the last minute to make my tag, hehe. Tell me what you think;

November Tag

As you can see, it's quite different than Tim's version but still has some similarities. I created the background with Distress Paints in Mustard Seed, Wild Honey, Rusty Hinge and Peeled Paint. Tim used corrugated board on his tag but I really wanted a rustic look, so I used the wood grain embossing folder. I dabbed  Walnut Stain Distress ink on the raised surface of my embossing folder before running it through my Big Shot. Tim shared this technique on a past tag and it's still one of my faves.


I don't have the Leaf Die so I had to improvise with an old leaf punch from my stash. I punched out 3 leaves out of Kraft Glassine and colored them with Distress Stains. I then crinkled them up in my hand and dabbed them with the  Walnut Stain ink pad and sponged gold acrylic paint on top. I also used the Tattered Pine cone die to create the little pine cones and some of the greenery. I sponged gold acrylic paint on the greenery and pine cones as well.


I threaded a piece of linen ribbon through the Alpha Parts words and tied it around my tag.
Then, I tied some dyed seam binding through the hole on  the tag and added chit chat stickers on the top corner. Lastly, I sprayed the entire tag with Perfect Pearls Mist in Heirloom Gold for some added shimmer. So, so pretty and just perfect for Fall.

Thank you so much for joining me today and I hop you like my tag. There's still plenty of time for you to play along.

I'll see you all real soon!