Showing posts with label graphic 45. Show all posts

Tuesday, June 2, 2015

Vintage Tea Themed Paper Bag Card

Welcome back to my blog! Today, I just have a quick card share I created for a challenge on Youtube. The challenge was hosted by Not2Shabby shop and required us to create a paper bag card. Having never made one before, I thought I'd participate and give it a go. Not only was so easy to make, but the card turned out great! Let me know what you think.


I went for a vintage, tea theme for my card with browns and pinks. I just love this paper collection by DCWV, appropriately called "Garden Tea Party". The paper bag I used is just a standard lunch bag size. I folded it in half and then adhered my papers. The closure for my bag is a bit of lace ribbon I had in my stash.

 
I created all the flowers from coordinating cardstock using Spellbinders Bitty Blossoms Dies. Then I dabbed them with white acrylic paint to make them more shabby. The leaves were fussy cut from the paper collection and I added pips to my flower clusters.


For the focal point of my card, I used a stamp set by Graphic 45 called Tea party. I stamped the images onto a piece of pattern paper and then fussy cut them out. I then,  adhered them to the Spellbinders circles with foam tape for dimension. The cute sentiment is from a Fiskars stamp set called Latte Love.


The inside is also decorated with the pattern paper. I created a pocket on the left hand side that's perfect for adding a gift card. The stacked tea cups and flowers were also fussy cut from the collection and adhered to the bottom right hand side. This still leaves plenty of room for me to write my message to the recipient.


 This is the back of the card, also covered with the beautiful papers.

That's it! I love the way it turned out. The paper collection and the stamps were just perfect for what I had in mind. Hope you like it too!

Thanks for stopping by. Have a wonderful day!

Friday, May 8, 2015

Mother's Day Coupon File Folder Folio

Good morning crafty friends. With Mother's Day only  a few days away, I thought I'd share with you a sweet gift idea for the special woman in your life. I was inspired by a grocery store run and a childhood memory. Weird, I know.When I was about 9 years old, I remember making a coupon book for my mom, for Mother's Day. Do you guys remember those? Each coupon was good for a small chore or kind gesture for your mom, to show your appreciation.Well, I was remembering all this while pulling out my coupon folio at the grocery store.You know, the kind that has pockets inside to sort your coupons? I combined the two ideas together and created my grown up version of that childhood coupon book to gift my mom this Mother's Day.


Here it is! Isn't it pretty? I thought Graphic 45's Precious Memories collection would be perfect for my project. I love the sweet mother and baby images and it has lots of blues, which is my mom's favorite color. The folio is constructed of card stock and I found the tutorial here. It measures 7x9 inches and has 6 pockets inside.


Here's a view of the cover. I did a lot of fussy cutting to create a collage, if you will. You can see bits of lace peeking out in the back and I used one of the post cards from the ephemera pack.I also used one of the chipboard pieces from the collection and accented it with tiny pearls and a sweet little bow.


I created 5 large, tag shaped coupons.Each has a sweet sentiment stamped onto one of the smaller journaling cards. Then I added fussy cut flowers and used the sticker sheet to spell out "coupon" at the bottom of each tag.


I printed out the coupons ,cut them out and adhered them to the back of each tag. So all my mom has to do is select a coupon and hand it over to redeem it. Easy, and this guarantees me some quality time with mom! We can take pictures during our times together and she can keep these pictures inside her folio. Precious memories! 

I do hope you like my Mother's Day gift idea and to all the mothers out there, I wish you a wonderful Mothers' Day!!!

Thanks for stopping by today. I'll be seeing you all real soon!

Saturday, February 28, 2015

Botanical Tea Storage Unit

Welcome back! Today I want to share another Guest Design Team project for Sacrafters. She was kind enough to send me  her 4-drawer storage unit and I thought it would be great to alter it for my craft area. I'm always in need of more storage, and this was the perfect piece to alter with the Graphic 45 Botanical Tea collection. I've been hoarding this paper pad ever since I got it,lol.


I love the way the storage unit turned out and the papers are just gorgeous! With all the roses and birds, it just makes me long for Spring. The Wood Flourishes and metal pulls by Kaisercraft add just enough detail to the drawer fronts.


I found a metal candle holder at my second hand store and I created a little nest inside. The candle holder resembles a little tea cup so it went perfectly with the theme of the papers.I fussy cut some elements from the paper pad, added some flowers and branches to create a botanical scene on top of the unit.


For the sides, I simply added doily die cuts from the Cheery Lynn French Pastry die and layered fussy cut elements. The metal corner pieces are by Momenta and are the perfect antique gold.

 Here's the back of the unit. Simple but pretty!

Hope you like today's project and thank you so much for stopping by.
Head on over to Sacrafters and don't forget to use discount code "lizfans" to get 10% off your purchase of $30.

Have a wonderful day!

Thursday, February 12, 2015

Tropical Shadowbox for SaCrafters

Good morning friends! I've been asked by the ever talented Sa, owner of SaCrafters, to be a guest DT member for the month of February. Sa designs creative and functional alterables out of wood, mdf, and chipboard. She sent me some great pieces to work with and today I'm going to share the first of four projects.


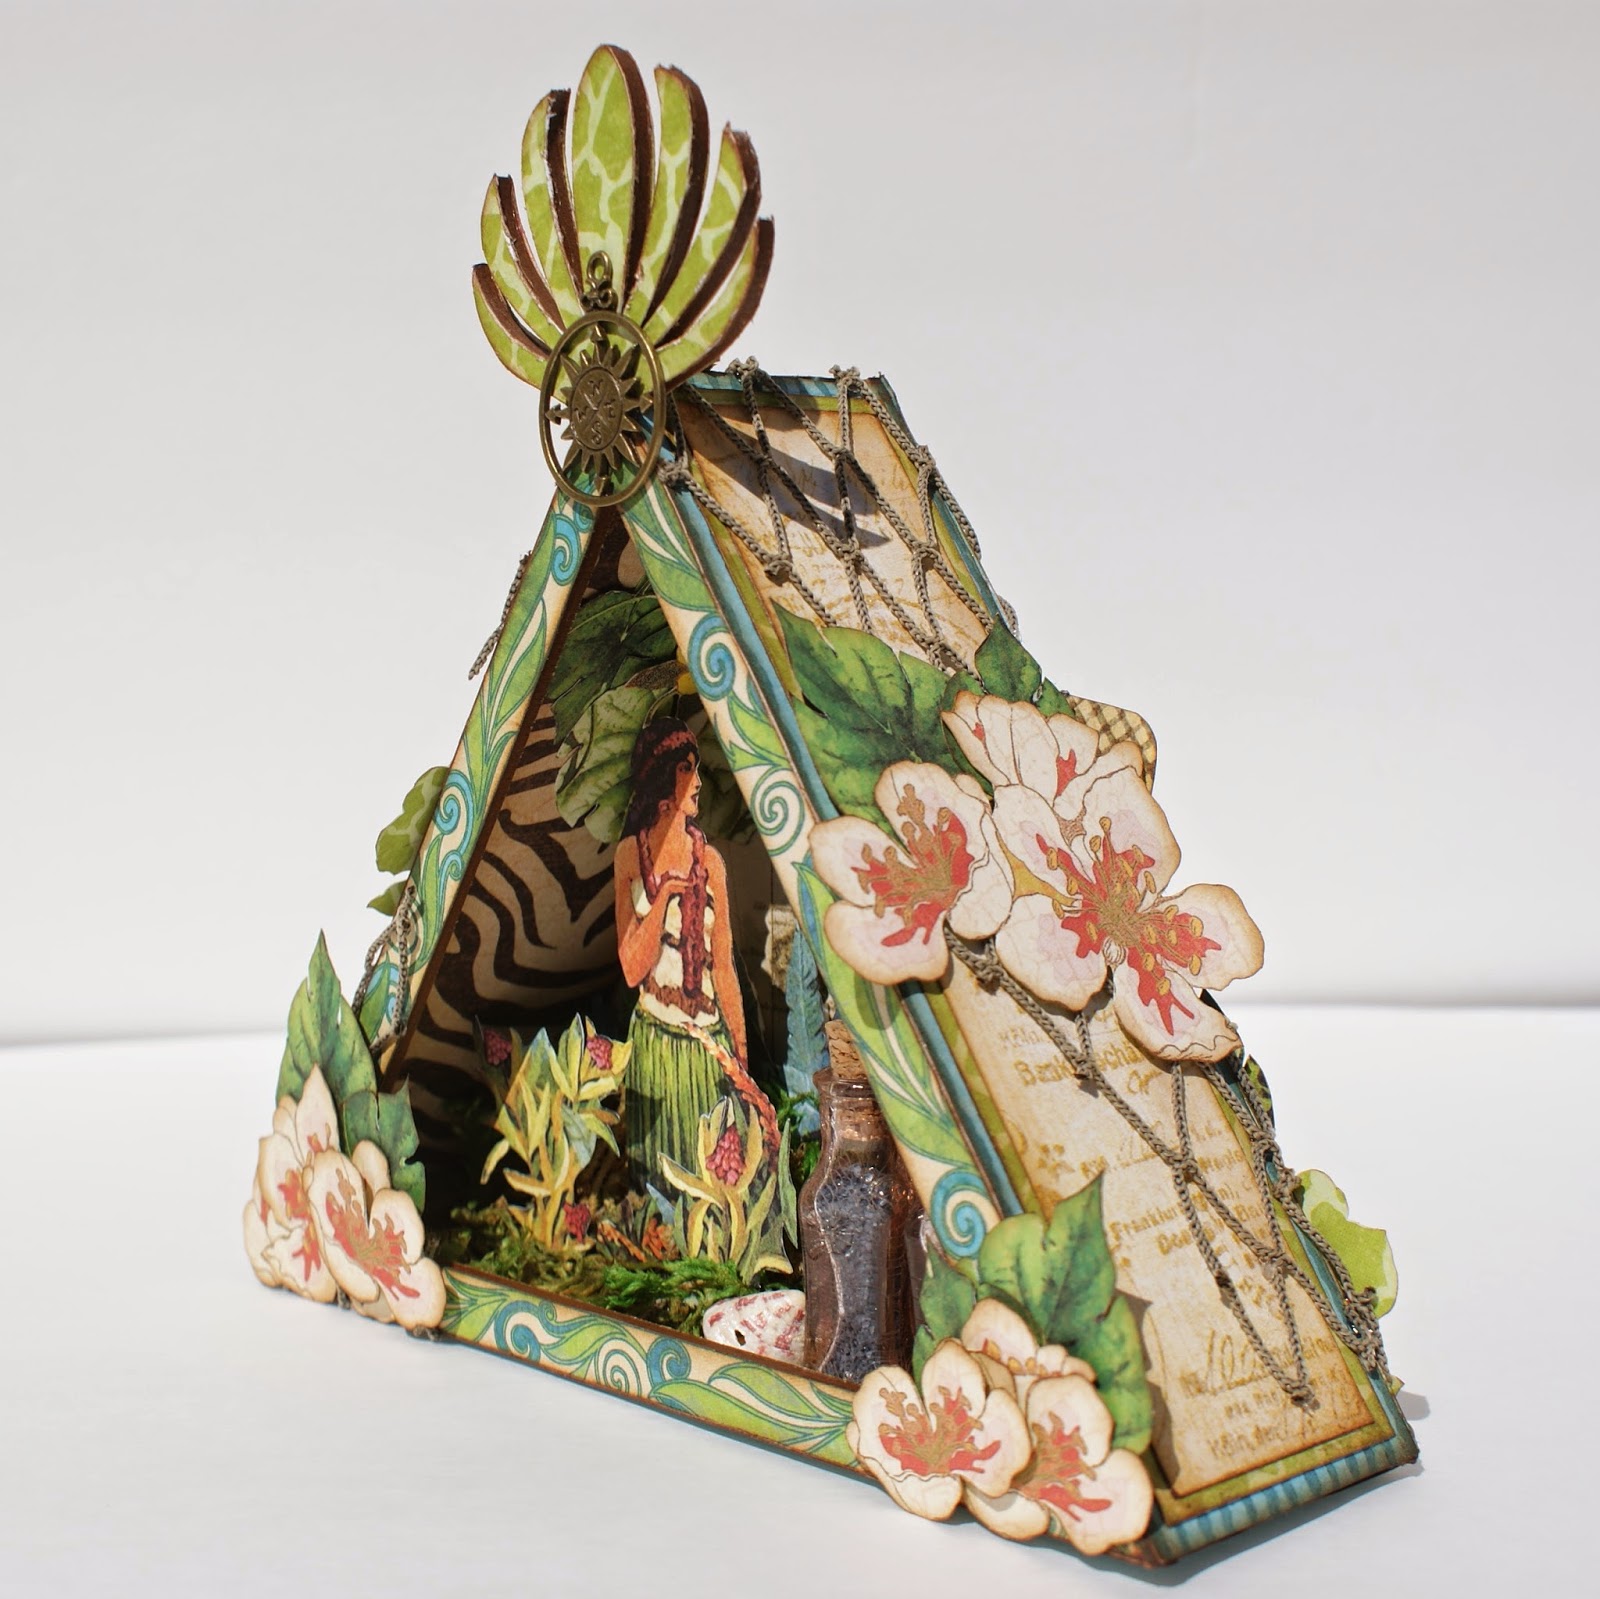
This is the Triangle Shadowbox available in her shop. As soon as I saw it, it made me think of the "Tropical Travelogue" collection by Graphic 45. I just knew it would be perfect for this project.


Inside, I created a tropical 3 dimensional scene. I did a lot of fussy cutting and layered all my pieces with foam and bits of moss.


The small glass bottles were brushed with Clear Rock Candy Crackle Paint and stained with Vintage Photo Distress Stain to give them a weathered look. I then filled them with different colored sand and added sea shells around them.

.


For the sides, I added bits of decorative netting and fussy cut flowers and leaves from the paper collection.


This is the back of the shadowbox. I simply layered some fussy cut elements to create a sort of collage.

I just love the way the shadowbox turned out and I think it would be a great way to display mementos from your tropical getaways.

Head on over to SaCrafters shop and check out an amazing selection of wood, and chipboard products, as well as stencils. You can use discount code "lizfans" for 10% off your purchase of $30 or more. The discount code is good for the entire moth of February.

Thank you so much for stopping by! Hope you all have a wonderful day!

Sunday, December 14, 2014

Graphic 45 Twelve Days of Christmas Advent Calendar

I'm back with my second post of the day! As you can tell, I'm a little behind on my posts so I want to catch up before the holidays are over!
This project is for my baby girl, who loves counting down the days until Christmas.

 Twelve Days of Christmas Advent Calendar

I picked up a paper mache advent calendar at HL and started off by painting the edges and compartments with Warm White acrylic paint. I then covered the advent calendar with papers from Graphic 45's Twelve Days of Christmas collection ( one of my faves). Each compartment is numbered and decorated with fussy cut images from the 8 x 8 paper pad. The numbers were stamped in Versamark and then heat embossed with gold powder.This really makes the numbers pop.


I sponged gold acrylic paint and Snow-Tex on all the edges to give them a snowy look.


 I fell in love with the signature page of this collection but it was too big to fit on the back. So I decided to "re-create" it , my way .  All the images were fussy cut from  the paper then layered over and  under the song lyrics.  I used foam tape on some of the images to give them more dimension.


I created a cute Christmas morning scene on top of the calendar. The little tree is from the dollar store. I dabbed it with white gesso, added gold bead trim, red bows and topped it off with a glittered star. All the tiny gift boxes and bags were made by hand using scraps from the paper collection. I found the little wagon and teddy bear in the miniature section of my local art store. They are the perfect addition to my Christmas scene.

Needless to say, my daughter loved it and looks forward to opening the little compartments each morning. There is always a sweet surprise awaiting her. 
Thank you so much for stopping by!

Sunday, July 6, 2014

Graphic 45 Steampunk Debutante Shrine

Hi everyone! I almost forget to share one of my favorite projects with you all. I made a Steampunk Shrine a few weeks ago, but had been too busy to post and then I simply forget all about it. So today, I saw it in a corner, covered with scraps from other projects and thought I'd share it ( before I forgot again, hehe).


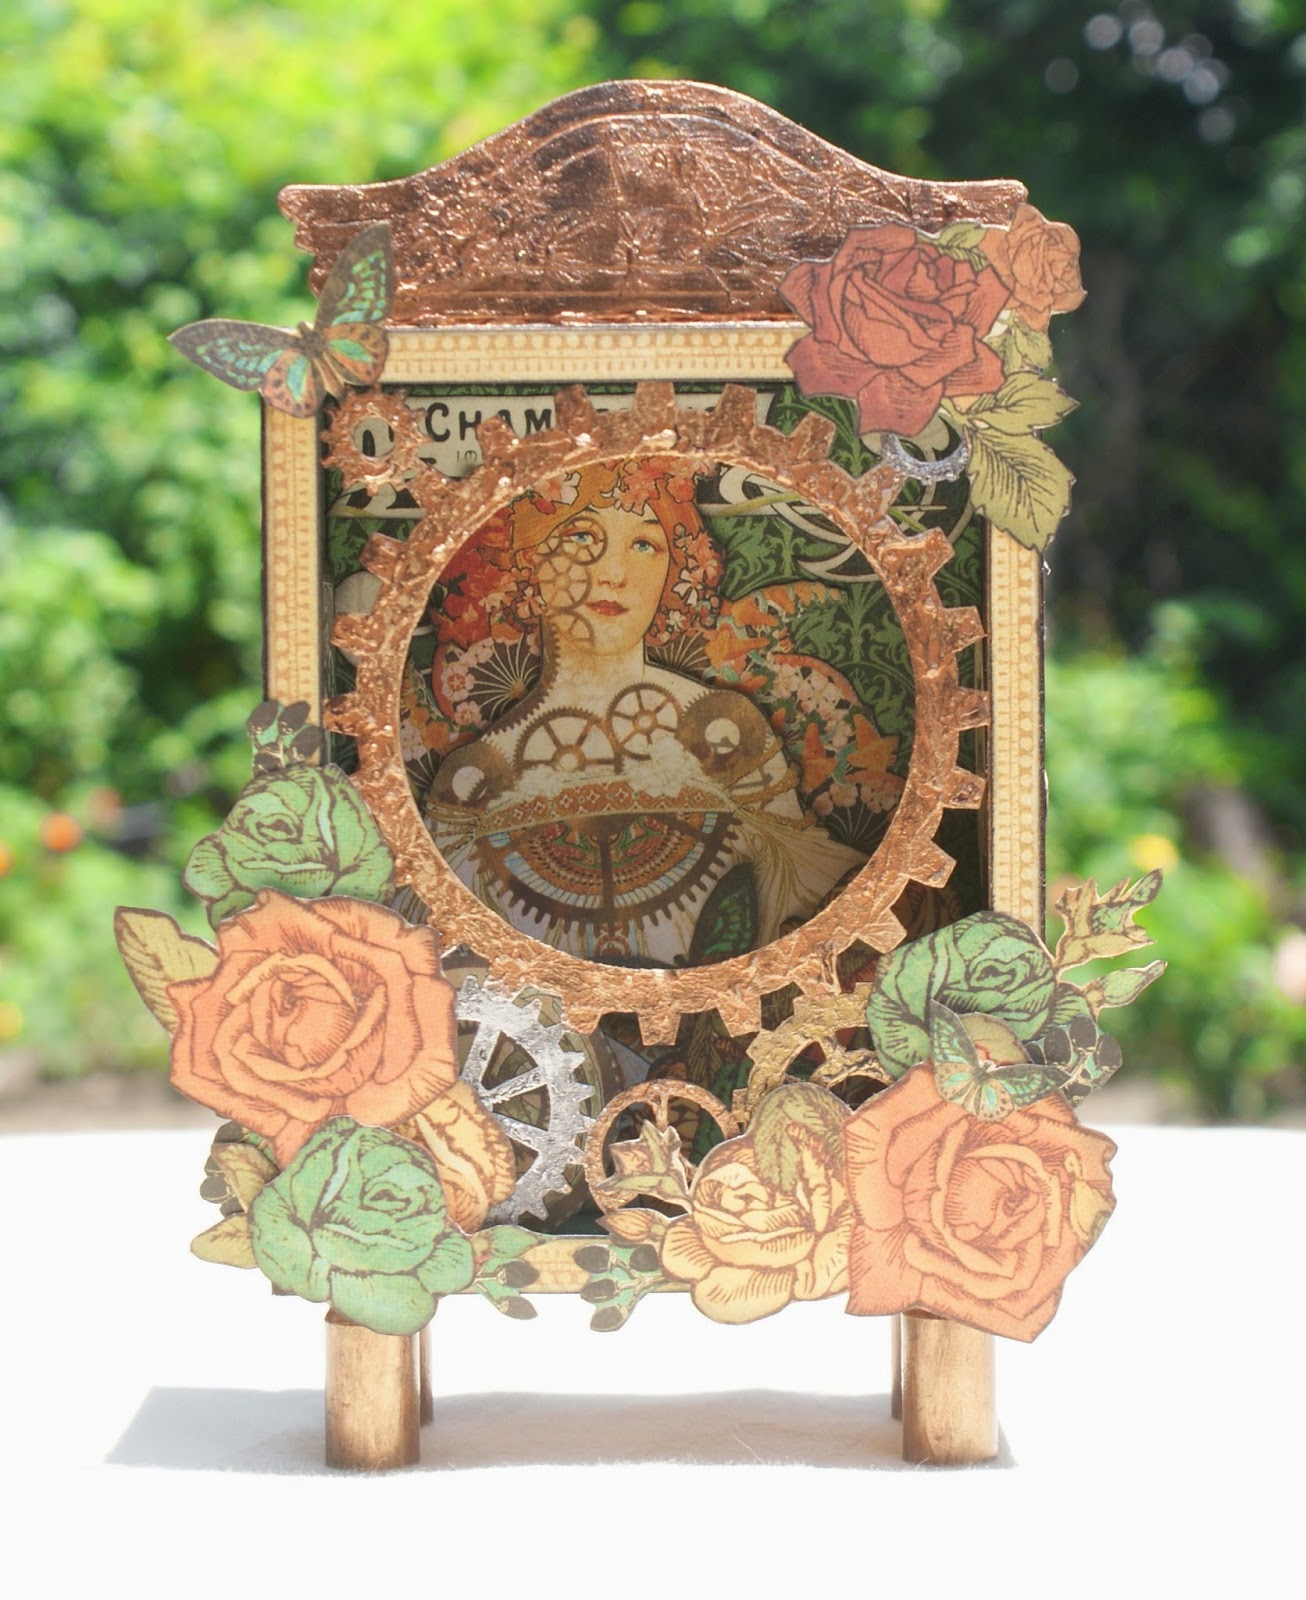
I started off with Sacrafter's Gears Shadowbox and covered it with Graphic 45's Steampunk Debutante papers. The gears were painted with metallic puffy paints and distressed with black gesso. I simply dabbed the gesso on top and then rubbed some off with my fingers. This creates a cool, grungy affect.I did the same technique on the chipboard pediment from Tim Holtz.


Look at the pretty Steampunk lady inside. I fussy cut several images and layered them over one another to decorate the inside of my shrine. 


I love the way the sides turned out. Again, these are all fussy cut pieces just layered together to create this design. It sort of reminds me of Tattoo art, don't you think?


From this angle, you can see some of the fussy cut images inside. It's hard to see all the details but there is a lot of layering going on.


The feet of the shrine are empty bullet casings adhered with E6000. I used my fingers and dabbed some of that coppery puffy paint and then grunged them up with the black gesso. I think the feet look so cool!!!


And here's the back of the shrine. I used one of the Steampunk frames and added mini gears to her hair. I also added glossy accents to the mirror eye to give it a realistic look. Then I just added a fussy cut butterfly to the flowers on the bottom left hand corner, and that's it.

Being a lover of all things Steampunk, it's only natural I fall in love with this piece. Almost everything I make ends up in someone else's home. But this puppy is all mine and I can't wait to add it to my display case! Hope you all like it as well and thanks so much for stopping by!

I'll see you all real soon...