Friday, March 20, 2015

Pretty Magnolia Tag made out of Packaging Material

Hi guys and welcome back to my blog! Today I want to share with you a great idea on how to turn you embellishment packaging into pretty tags. Whenever I open a new package, I'm always looking for ways to re-purpose the packaging. Whether it be cardboard, plastic, netting, etc. The backing material on some of the embellishments, come in great shapes and can make for awesome tags. I've created a beautiful Magnolia tag out of Prima packaging as my design team project for Not2Shabby.


Turning your packaging into a pretty tag is quite easy. I always look for packaging that has a neat design or details, such as eyelets, as my base. Then you simply trace the packaging onto designer paper of your choice. Cut it out and adhere to both sides of your packaging material with your favorite adhesive.


So here's the pretty tag I created using the sweet Magnolia image. It's called Tilda with Hanging Rabbit and you can purchase it here. I've used Colorbok's Victorian Parlour collection to cover the tag and inked all the edges with Brushed Corduroy Distress Ink. I also busted out my Doohickey dies and some pretty laces I had in my stash.


I colored the image with my Copic markers and I paper pieced her dress and boots. I also added Frantage in Shabby White around the image for more detail. It's my first time using it and I love the way it looks!
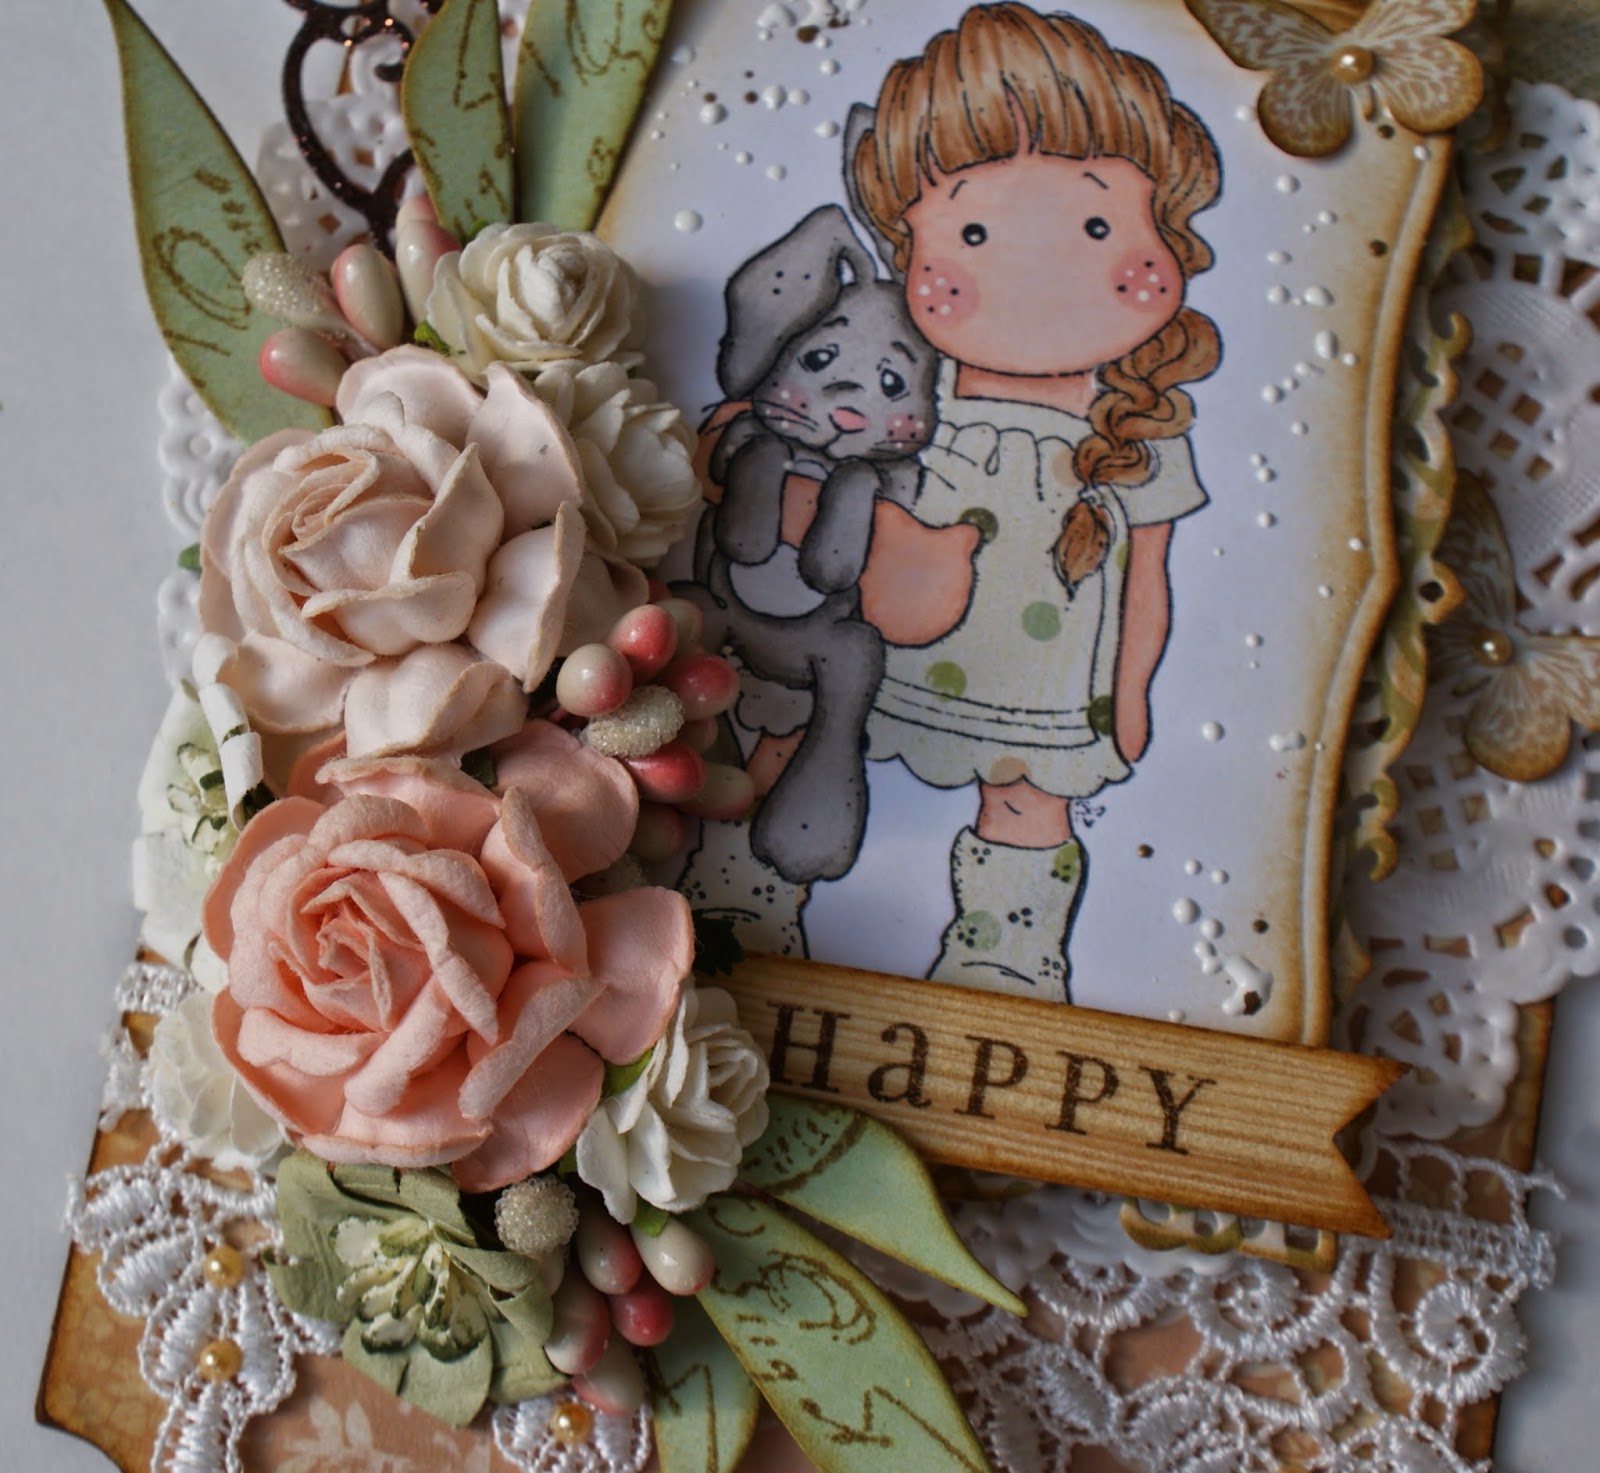

The flower cluster turned out so pretty. I just used flowers from my stash and these cute little pips I picked up at my local craft store. The leaves are from the Doohickey Club Dies Volume 4 and I stamped on them and inked them with Brushed Corduroy. The wood banner has been in my stash for ages and I thought it would make for a perfect sentiment on my tag.

I hope I've inspired you to look at your "trash" in a whole new way. I think I'll be making a few more of these tags!
Head on over to Not2Shabby and take advantage of Jamie's flash sale going on now until Sunday March 22. Almost everything in the store is 10% off and if you use Discount Code "LIZRUSSELL" you will get an additional 10% off your purchase. What a great deal!

Thanks for stopping by and I'll see you all real soon!

Tuesday, March 17, 2015

Magnolia Altered Wood Gift Bags

Hi guys! Welcome back to my blog.Today I want to share a design team project for Not2Shabby.
Jamie was kind enough to send me some really cute stamps to work with this month and I received another Tilda! Would you believe it is only my second Magnolia stamp ever, lol. Between the cute stamps and the Dookickey dies, I'm officially hooked on Magnolia!
Since I'm all fired up for Spring, I created another Spring themed project.


I had picked up these cute wood gift bags at my local craft store and thought it would be cute to alter them as little favor boxes. I painted the inside of the boxes and covered the outside with Prima's Songbird collection. It's an older collection but oh so pretty and I just love the soft colors.
The sweet Magnolia stamp is Tilda with Hanging Rabbit and it was stamped onto watercolor paper and colored with watercolors for a soft look. 


 I used a lot of my Doohickey dies to create an outdoor Spring scene. The butterflies are from a MS punch and all the edges are inked with Brushed Corduroy Distress Ink. 


I inked all the die cut pieces too,to make them pop against the soft background. Then I added little pearls to the flower centers and on the hanging sign.


 On the back, I created a little envelope to hold a small card for the recipient. 


This is the second one I made. It's very similar to the first one so I'll just post some pictures.


I think they turned out so cute. Now, all I have to do is fill them with goodies and they're all set! 

Head on over to Not2Shabby and don't forget to use discount code "LIZRUSSELL" for 10% off your purchase.
Thanks for stopping by and have a wonderful day!

Sunday, March 15, 2015

Tags of 2015, March

The sun is out!!! The sun is out!!! Sorry, I just couldn't contain my joy, lol. After not having seen the sun in so long, I can't help but be happy! So in honor of the beautiful sun and the warm weather to come, I created a Spring inspired tag as my take on Tim' March tag.


I followed Tim's techniques to create the background on the tag, but just switched up the colors. You can check out Tim's tag here.Since I wanted to go for a shabby look, I used Distress paint in Broken China, Antique Linen, Victorian Velvet, Bundled Sage, and Brushed Corduroy.The effect was so pretty and I think it's just perfect for Spring. 


I used my homemade texture paste and gold embossing powder to create the really cool enamel look. The butterfly stamps are from my stash and I stamped them with Archival Ink and covered them with clear embossing powder. The crinkled seam binding bow was dyed with Victorian Velvet. It's such a beautiful color!


I added a word band with some jute rope at the bottom of the tag. Then I embellished the tag with Tim's Metal Foliage. I dabbed the metal pieces with Distress Paint to give them a more shabby look too.
Overall, I think it turned out very pretty and it was so much fun to create. You still have plenty of time to play along, so head on over to Tim's blog and check out his awesome tutorial.

Hope you like my tag and thanks so much for stopping by!

Sunday, March 8, 2015

Parisian Themed Layered Card for Not2Shabby!

Happy Sunday everyone! I hope your day is a bright and sunny one, because mine doesn't look like it's going to be. We had a severe thunderstorm all night, here in Spring. The thunder was making the entire house shake and the rain would not let up. So needless, to say, it's wet and gloomy out there.But days like this do have their upside because it means I can stay in and have more crafty time! Today I'm sharing a bright and cheerful card I created for Not2Shabby.


This is my attempt at a layered card similar to the ones I've seen on Pinterest. The image stamp is by Whimsy Stamps called Walkies. I colored her hair, skin and the little pup with my Copic markers and then, I paper pieced her outfit. I hadn't colored black hair in a long time, that I almost forgot how to do it,lol. It took me 3 tries until I was happy with the results.


The designer paper I used is Authentique's Classique Pretty collection. I love the color combo of pink, black and white. Very Parisian don't you think?


I used several Magnolia Doohickey dies on my card and tons of flowers from my stash . Small seam binding bows and bling add an elegant feel to the card.


The sentiment is a sticker from the same collection and I just adhered it to a scrap piece of coordinating cardstock. 

I really hope you like my card and I invite you all to visit Not2Shabby shop. Jamie carries the most amazing stamps at great prices. You may also use discount code "LIZRUSSELL" for another 10% off your purchase.
Thank you so much for stopping by. I hope you all have a pleasant day!

Saturday, February 28, 2015

Botanical Tea Storage Unit

Welcome back! Today I want to share another Guest Design Team project for Sacrafters. She was kind enough to send me  her 4-drawer storage unit and I thought it would be great to alter it for my craft area. I'm always in need of more storage, and this was the perfect piece to alter with the Graphic 45 Botanical Tea collection. I've been hoarding this paper pad ever since I got it,lol.


I love the way the storage unit turned out and the papers are just gorgeous! With all the roses and birds, it just makes me long for Spring. The Wood Flourishes and metal pulls by Kaisercraft add just enough detail to the drawer fronts.


I found a metal candle holder at my second hand store and I created a little nest inside. The candle holder resembles a little tea cup so it went perfectly with the theme of the papers.I fussy cut some elements from the paper pad, added some flowers and branches to create a botanical scene on top of the unit.


For the sides, I simply added doily die cuts from the Cheery Lynn French Pastry die and layered fussy cut elements. The metal corner pieces are by Momenta and are the perfect antique gold.

 Here's the back of the unit. Simple but pretty!

Hope you like today's project and thank you so much for stopping by.
Head on over to Sacrafters and don't forget to use discount code "lizfans" to get 10% off your purchase of $30.

Have a wonderful day!

Thursday, February 26, 2015

Spring Garden Card-in-a-box

Hello there crafty friends! Today was the first time I've seen the sun in what seems like forever. It's been so dark and gloomy, here in Spring, Texas.. Now I know I shouldn't complain when some of you are dealing with 6 feet of snow and blizzards, but I'm just so ready for warmer weather. Aren't you? So in my attempts to get myself ready for  spring , I  created a garden themed card-in-a box. This is only the second time I've made one of these cards and I have to say they are so much fun. Not to mention adorable!


 The card is a Design Team project for Not2Shabby. I used an older paper collection by DCWV called The Preppy Princess Stack. I just love the soft colors and the images, perfect for fussy cutting.


The sweet image stamp is by C.C. Designs, called Rose. I've used her before on another card and I think she is just precious. I stamped the image onto watercolor paper and then colored her skin and hair with watercolors. I paper pieced her outfit using scraps from the paper pad.


I used 4 strips inside my card to get a fuller look for the garden. I love how it looks like she's standing in the middle of all the flowers. I die cut the  little fence from a Magnolia Doohickey die and the cute little clouds are felt stickers from my stash.


The sentiment was fussy cut from the paper pad as well as all the flowers on the side panels. I added cute little pearls to the flower centers.


This is the back of the card where I can write my message to the recipient. Some simple fussy cut elements adorn the corners.

 I think it turned out so cute and I really cannot wait for my roses to bloom come Spring.I really miss seeing all the beautiful colors in my garden.

Hope you like my card! Head on over to Not2Shabby to get the best deals on all your favorite image stamps. Use discount code "LIZRUSSELL" for 10% off your purchase.

Thank you so much for stopping by. Hope you all have a great day!

Tuesday, February 17, 2015

Tags of 2015, February

Hi guys! Today, I'm going to share my take on Tim Holtz's February tag. I just loved Tim's version so I stuck very closely to his original design.

February Tag


First, I created the background using bits of the Wallflower paper pad since I didn't have the ephemera pack. I sealed it and added the shadow effect with the Black Soot Distress marker and splattered a little bit of black paint on top. I wanted to soften up the edges of the tag so dabbed Picket Fence Distress Paint on all the edges, after sanding them lightly with the sanding block.


I don't own the Movers and Shapers heart die so I had to create my own out of chipboard. I cut 3  hearts by hand and glued them together for dimension. Then I painted the heart red and used glossy accents to cover it with Festive Berries Distress Glitter. I just really felt like having some sparkle on my tag!The tiny key hangs from the heart with a piece of embroidery floss and since I didn't have a word band I used Chit Chat and Label stickers to create my sentiment.


I really liked the way Tim attached the heart charm to the arrow so I did it the same way.Then added bits of lace and a mini corner on the bottom left corner of the tag. I topped off my tag with a seam binding bow and Voila!

Loving the way it turned out and I cannot wait to see what Tim has in store for us for March! 
Thanks for stopping by and have a wonderful day!